It’s been a minute. I have some good reasons! So before I get into it the theme of this post (it’s about sourdough baking of course), we went to New York and we got a dog! So if you can imagine, that’s taken a bit of my time.
So back to the point, I finally decided it was time to actually put Brad IV to work. And I wanted to see if I could hack true sourdough bread. WELL I DID. And I’ve only gotten better.
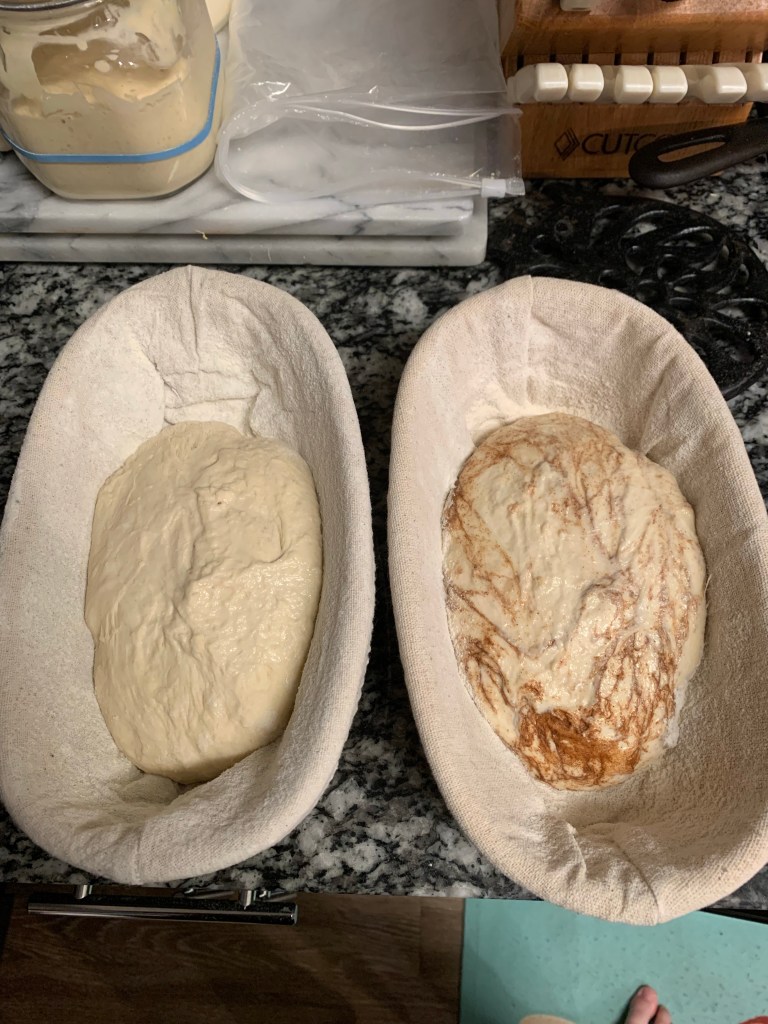
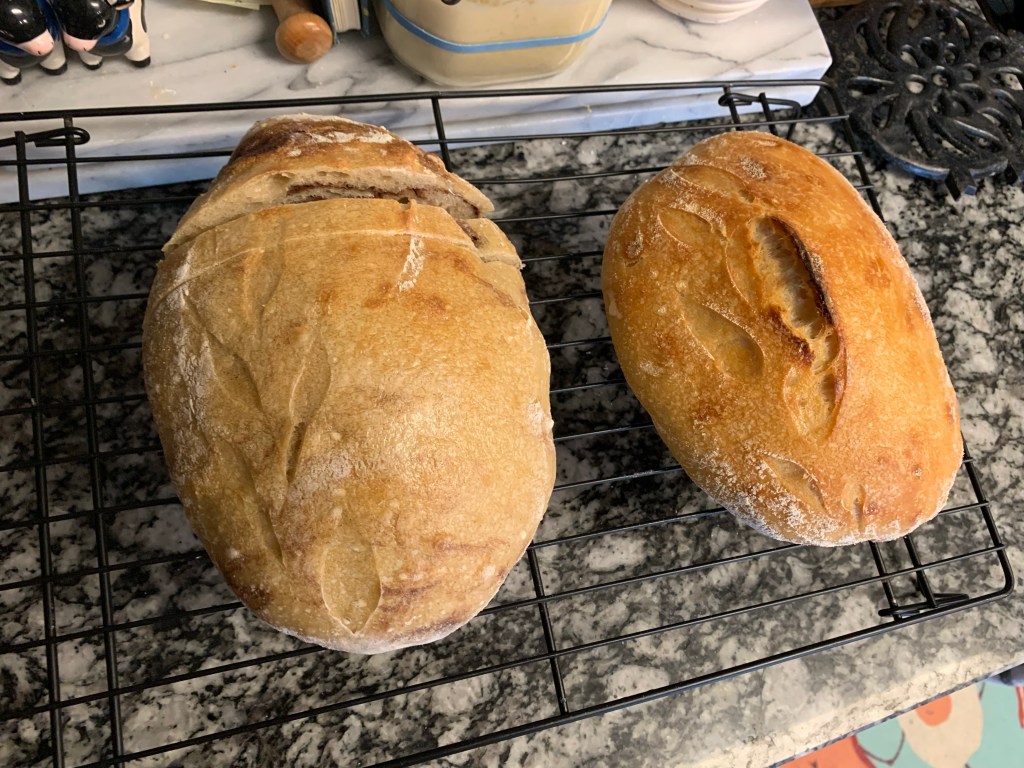
To begin with, I went with a beginner’s sourdough recipe from Farmhouse on Boone. For the flour, I used King Arthur’s organic all purpose flour. As I said, I wanted to hack “real bread” and I didn’t want the burden of gluten-free flour holding me back anymore. The dough came together easily. I did 4 stretch and folds and bulk fermented on the counter. After bulk fermentation is when you shape and place into your banneton to prove. I split my dough in half so I could experiment. One I proofed on the countertop for about 4 hours and the other went into the fridge overnight.

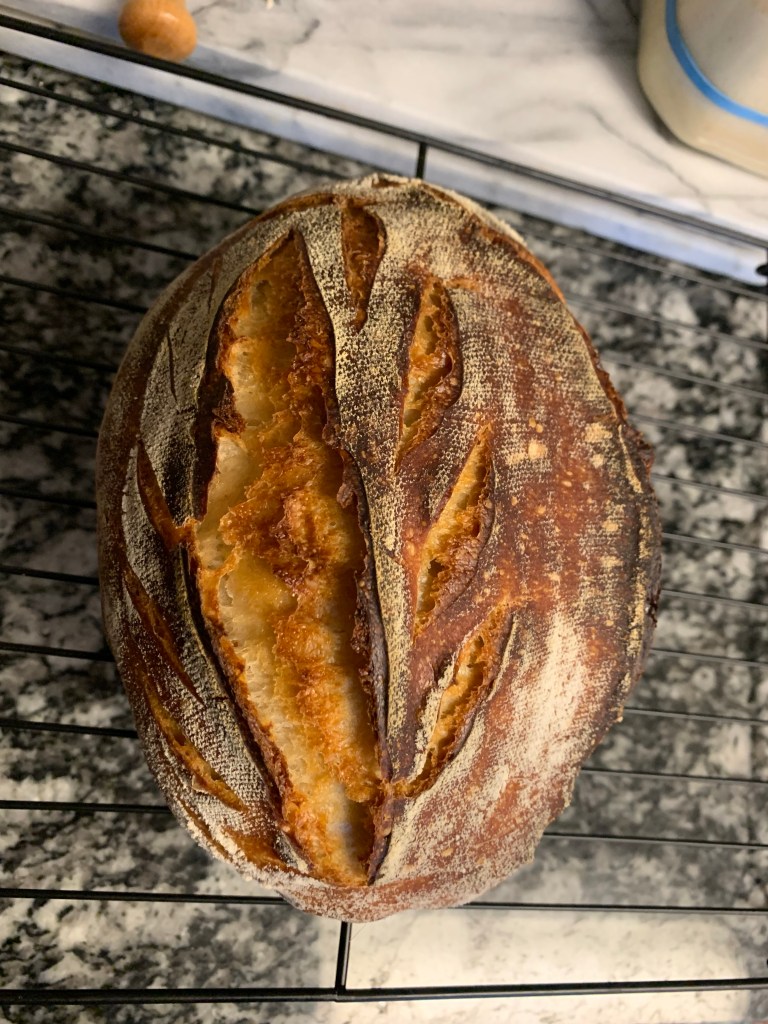
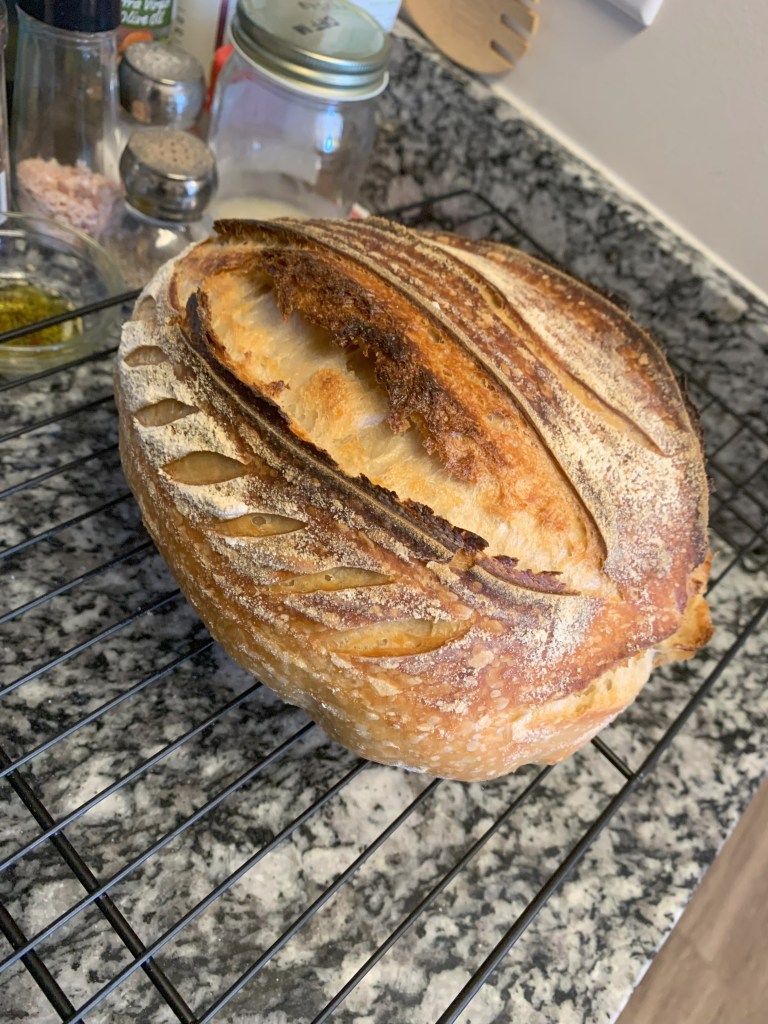
OMG look at that loaf! I follow the recipe exactly and it came out so pretty.
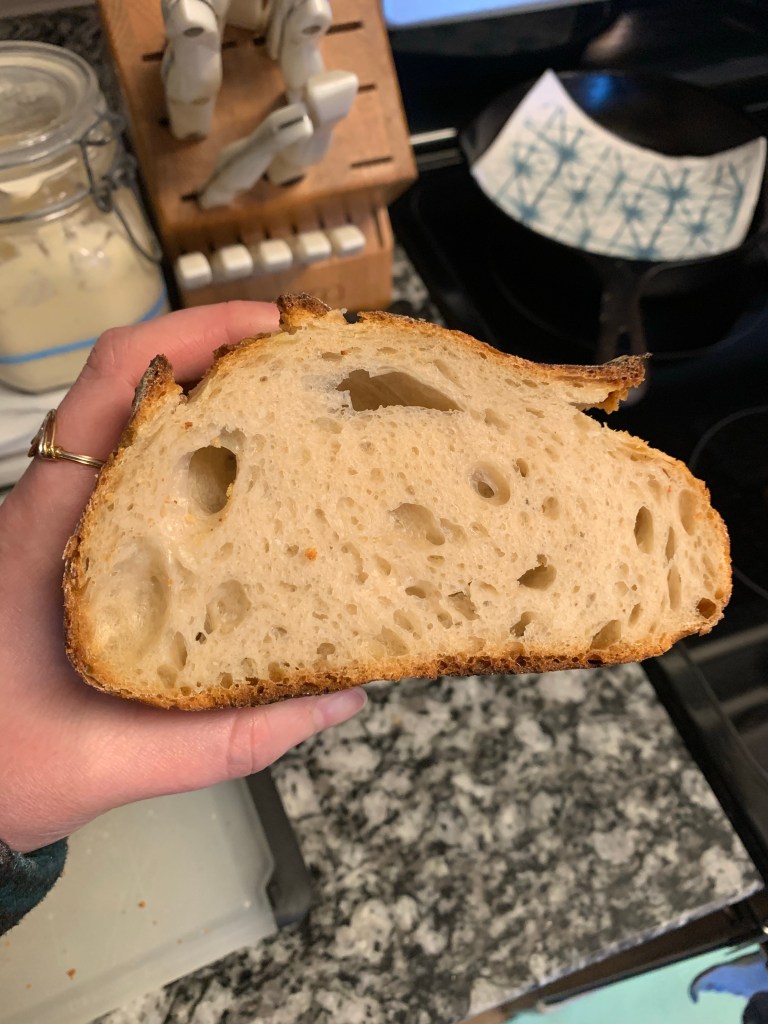
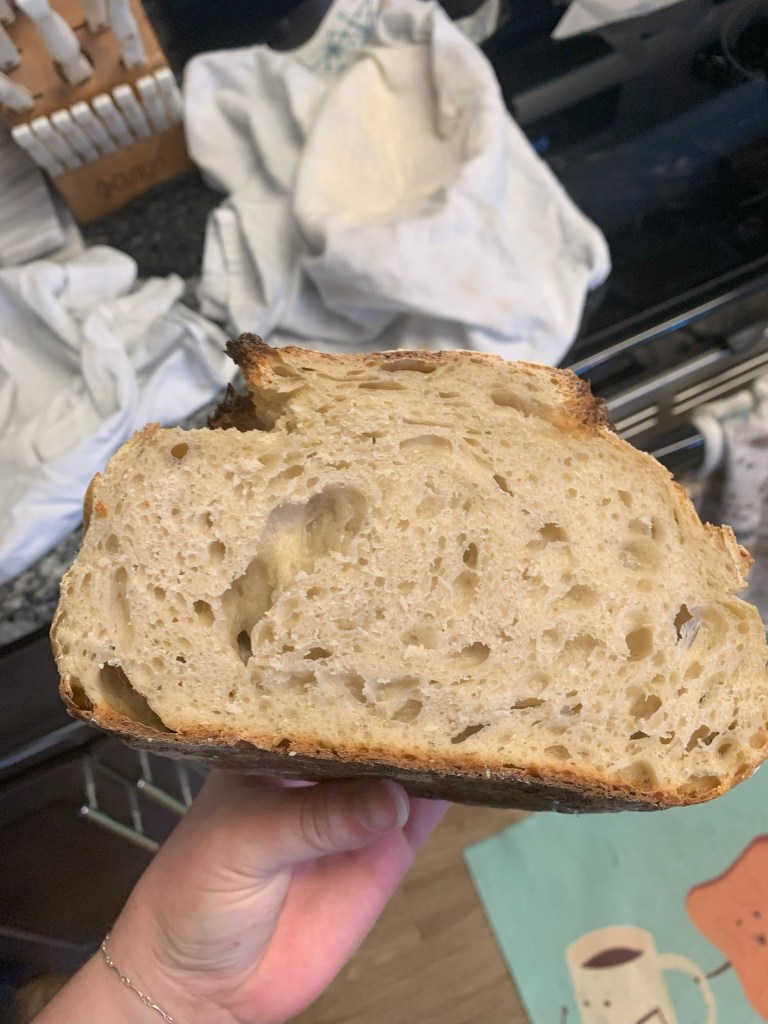
We even have a lovely view of the crumb. The chew was great. My slice was perfect with some butter too. The crust was a little tough for me. So I decided for the next loaf I would cut my Dutch oven preheat time a bit shorter.
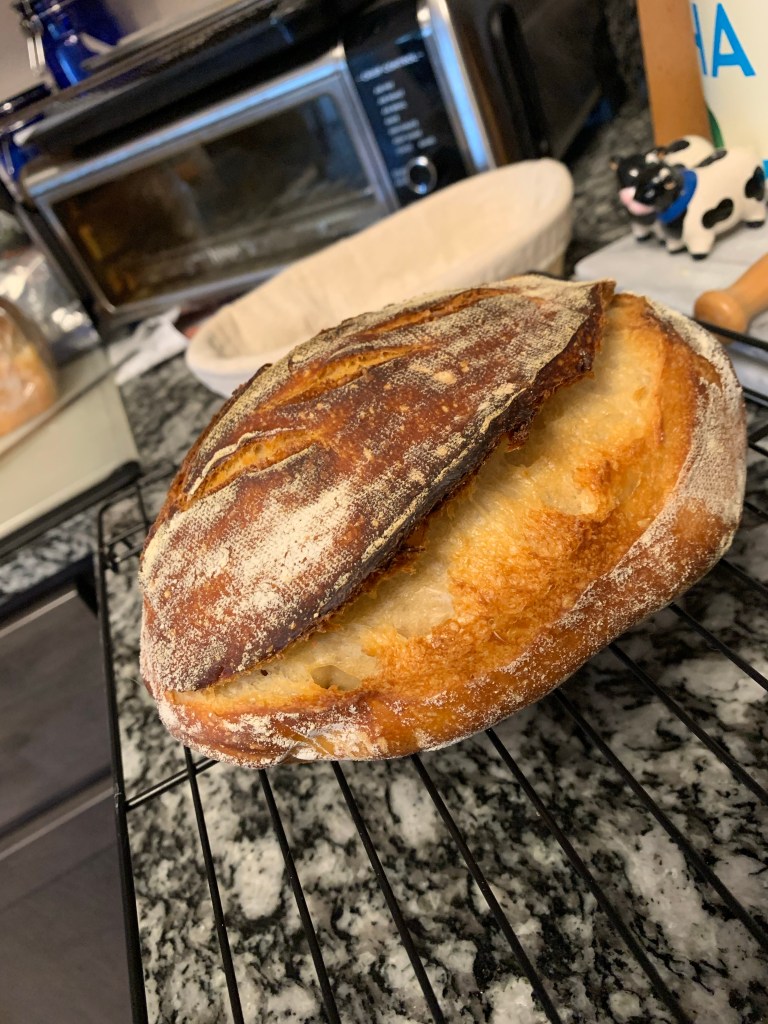
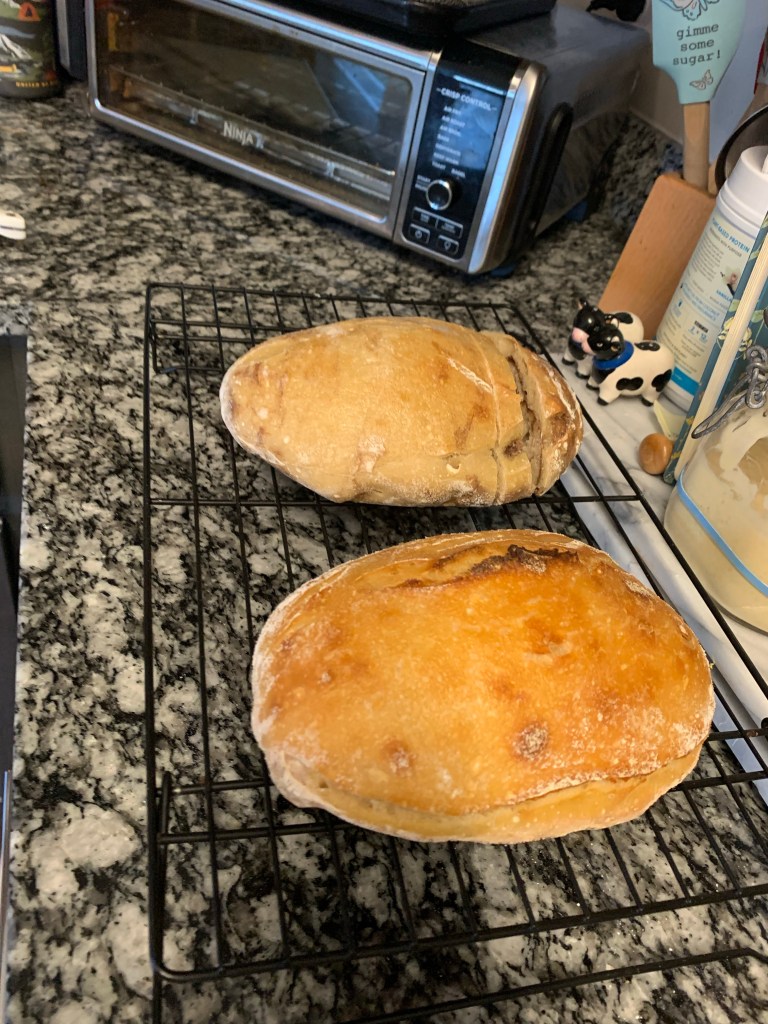
Here is loaf two of the same batch. (If I remember correctly…) Everything was the same, except I cut my Dutch oven preheat time shorter. Crazy difference!

The crumb difference is also shocking. Those caverns are pretty huge. The taste was still good though!
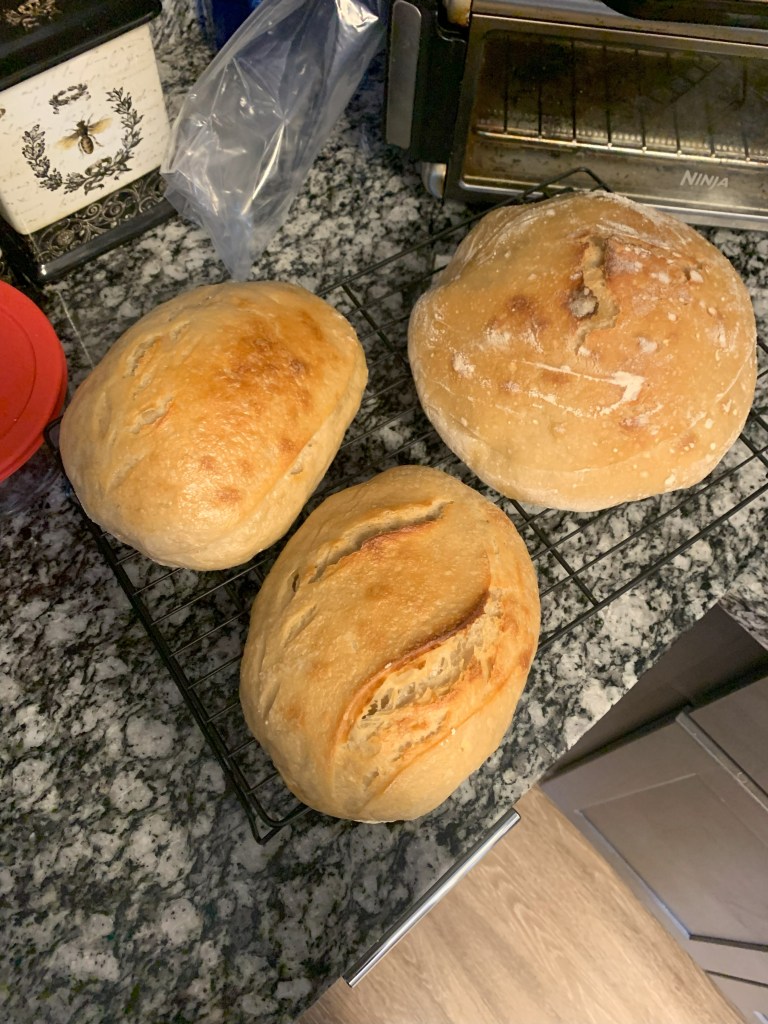
Well I was on a roll. So I decided to bake more bread. I was feeling pretty good after that first loaf. I did the same thing and split the dough in half so I could experiment again. I even went a little ~funky~ and added cinnamon.
Now I don’t know if you can tell from the photos above, but the loaves are not as pretty and not as defined. My hydration was waaaay off. They were a sticky mess. But as they say, bake the bread anyways!
and end up with some flat pancakes…. I honestly should’ve made focaccia out of the plain loaf. I will say the cinnamon was great! The next time I do a cinnamon loaf, I will definitely add more, because it was good when I had it.
So then it was the weekend before our trip and I suggested to friends and family I could bring them some bread. I don’t know what happened but again my hydration was way too much! I needed to experiment some more and really pay attention to my scale weights.
But you know what? No one complained about the taste – and I think that’s what really matters the most. Fun fact, a large loaf of bread wrapped in tinfoil in your carryon will get your bag flagged and wanded for explosives.
Are you ready for the glow up you never knew you needed?
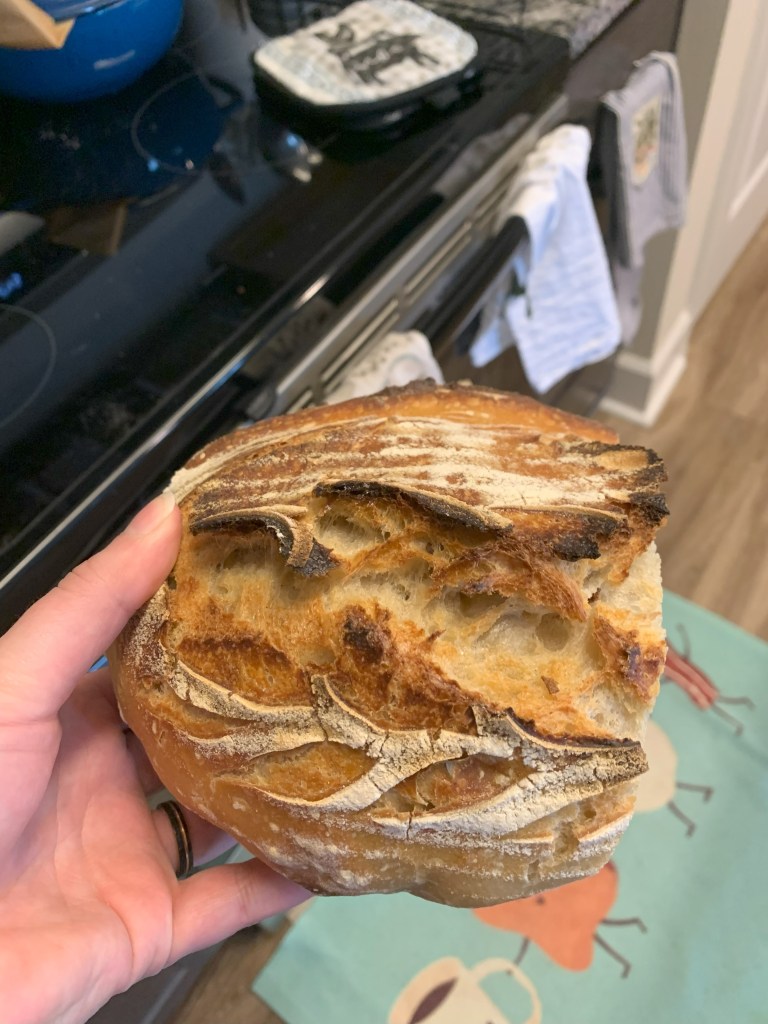

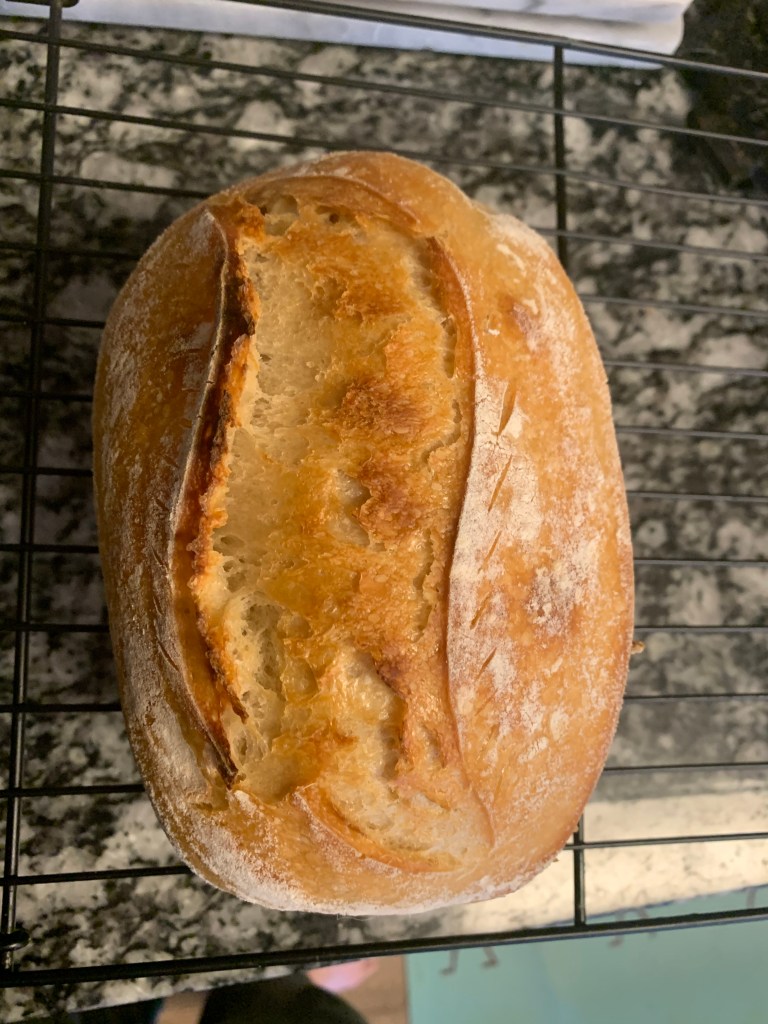
So after bring Brad IV back to room temp, I fed him, discarded a little over half, then fed him again and that brought him back to his active self; Producing the glorious loaf above. I stuck to the recipe to a T regarding ingredients, did a preheat of 20 minutes at 450 and did not turn the temperature down after taking the lid off. I have maintained that and have been super satisfied with my crust.
Now how am I supposed to keep this consistency in my loaves but also develop my skills? Well during our trip to New York, we stopped at the lovely Strand Bookstore and came across a bread diary! It literally helps you track everything about your starter, the day you mix your dough, your method, your outcome. It’s so neat, I love it. Which also means I can make a few modifications and figure out what works and doesn’t work and not have to rely on memory about what I did. Which is difficult to do when you have multiple loaves going at once – which I may or may not do…
Okay, here we are I am feeling super confident and playing around with my water and flour measurements but still keeping the ratios the same (no high hydrations for me thanks).
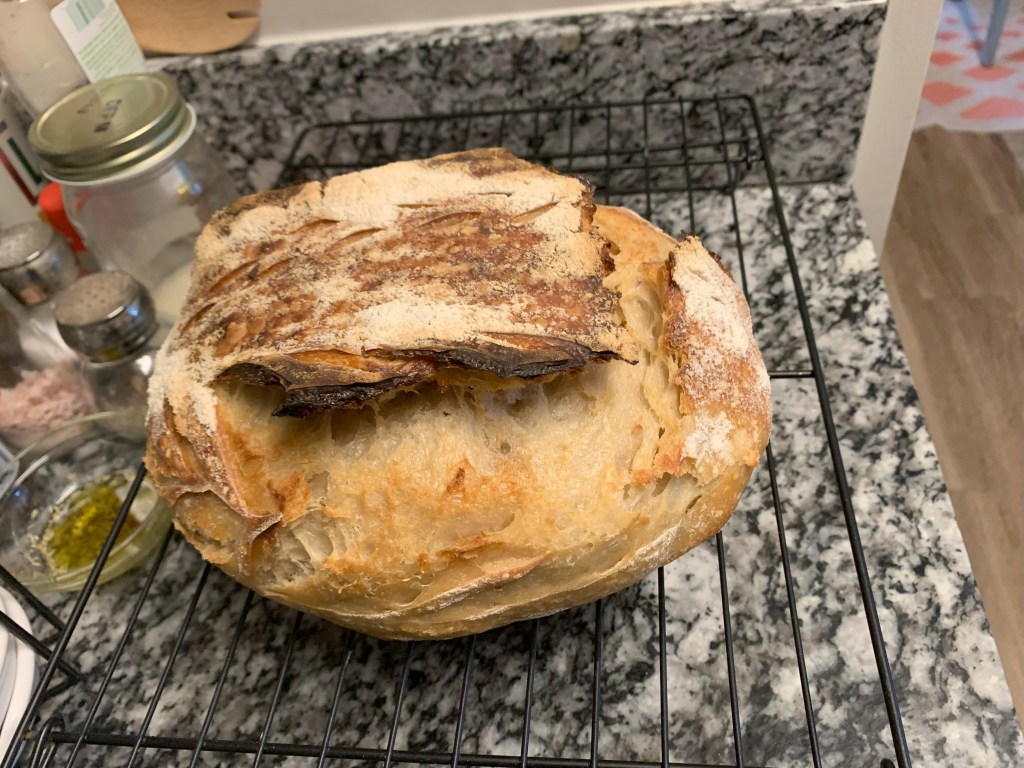
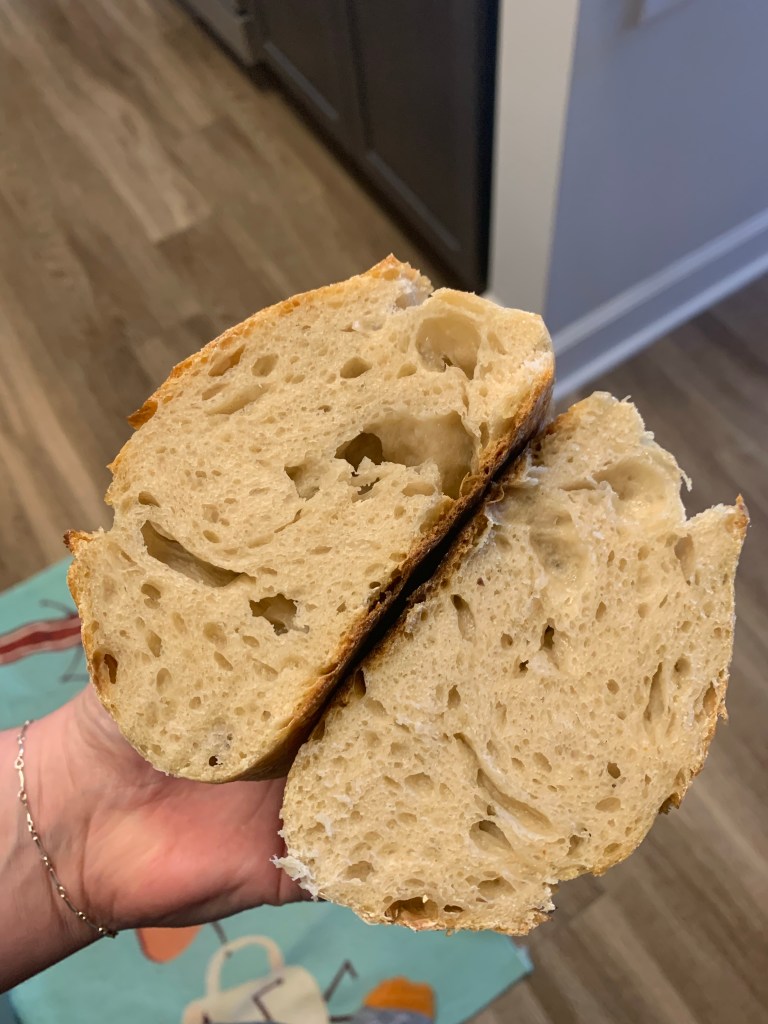
The importance of a crumb shot is to help you determine if your dough was over or underproofed. Of course sometimes that can look the same depending on if you were just slightly over or under. I am not an expert at determining these things. I do know what gummy and dense bread looks like and that is NOT this! So I will say I am on the right track of honing my sourdough bread skills.
I mean look at this. She’s beauty, she’s grace, she’s at least worth $7 in a bakery window depending on if you live in a small town or $15 if you live in California!
The benefits of mastering your basic sourdough means you can then start adding inclusions. My first inclusion of choice? CHEESE OF COURSE. If you are family or friend, you know I love cheese. Love love love cheese. I do not have a ‘meat and cheese’ drawer in the fridge. It’s a ‘cheese and cheese’ drawer.
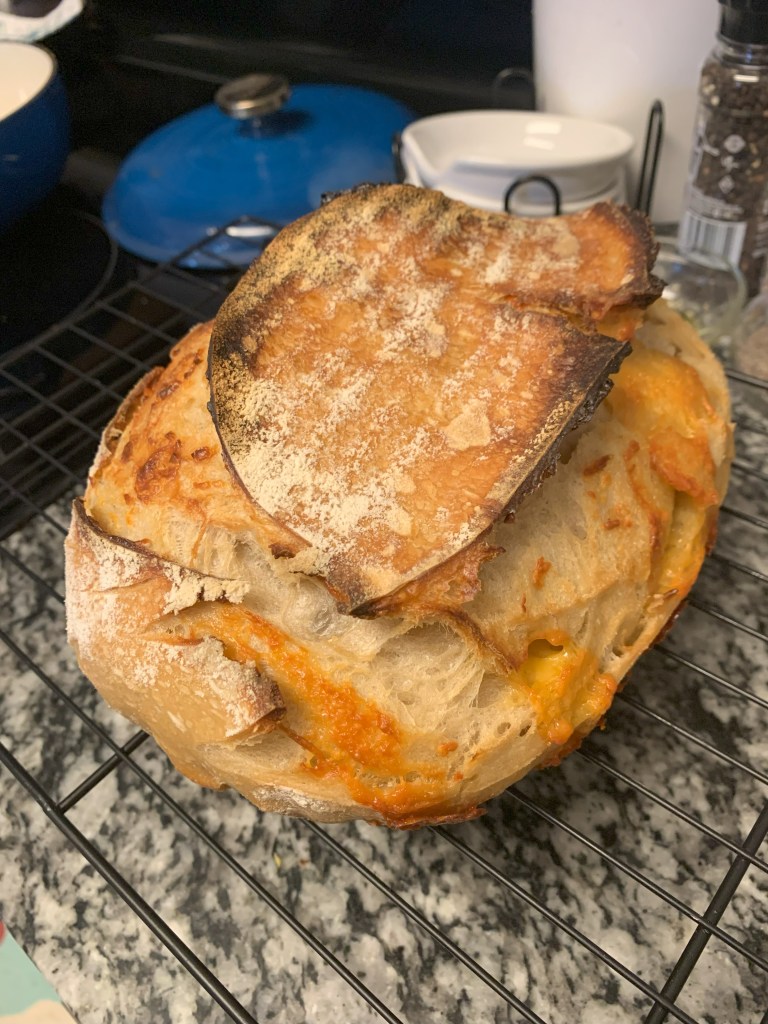
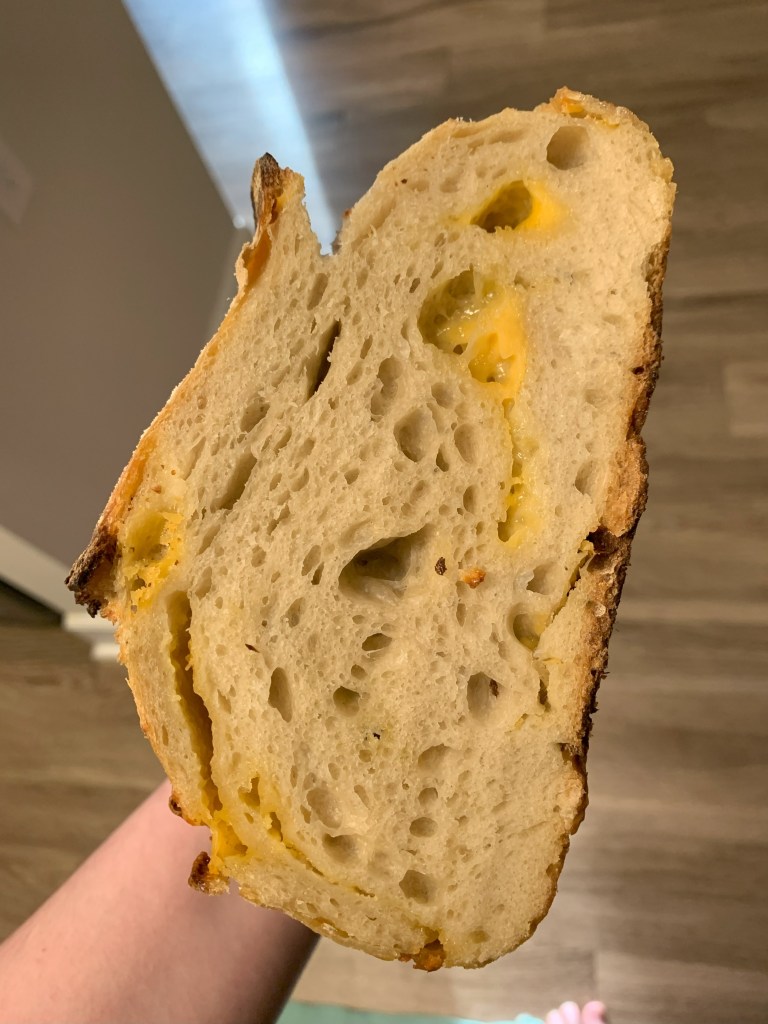
For this loaf, I went with your standard cheddar. First I did my normal dough and bulk ferment. It wasn’t until shaping did I add the cheese. For my inclusion, I did small block, shaved, and shredded variations. It is really hard to tell how much you are adding and how much will actually come through later without making your bread stodgy. Did I weigh out how much cheese I used? No, this was totally eyeballed. As you can tell from the crumb shot, there are pockets of cheese, however throughout the whole loaf it wasn’t as distributed as much as I had hoped. I don’t know if it’s because of how I shaped or if it’s because I just didn’t have enough cheese (more cheese is always the answer anyways, in my opinion). This will definitely be something I will be practicing again.
Well you made it to the end! This of course was not my last loaf I’ve made. I have two cooling on the rack right now. Be on the lookout for any posts I make with fun inclusions I decide to add.
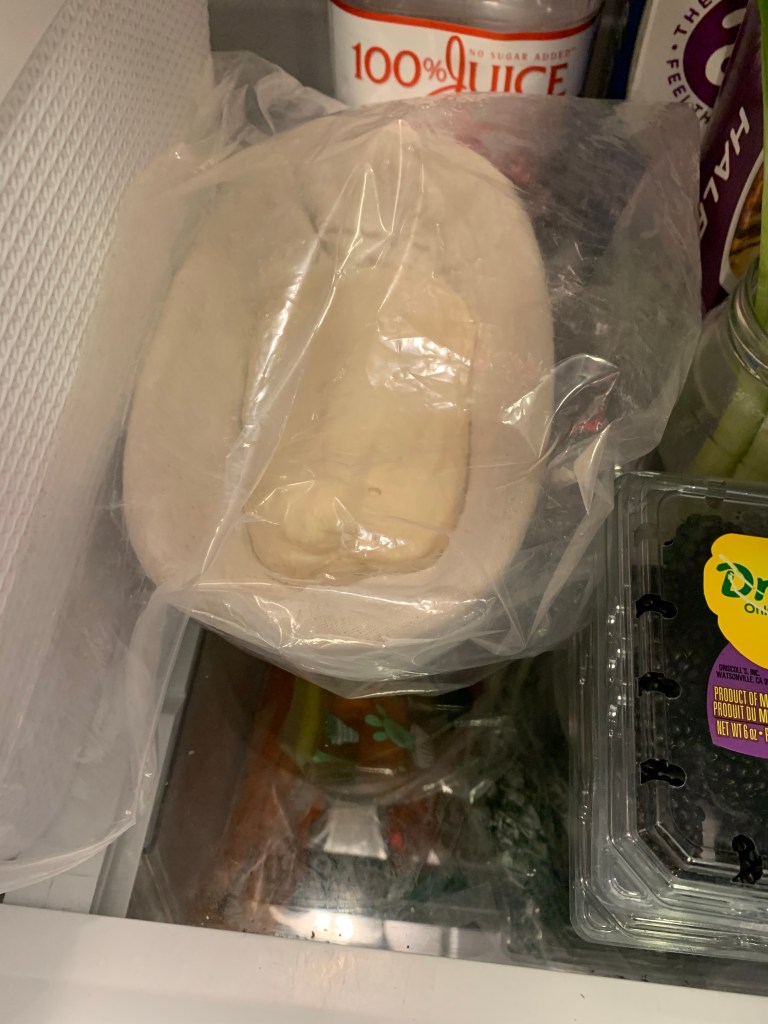
Who knew a little vacation to the big city (and a stint in the fridge) was all you needed for some gorgeous loaves? If you would like my recipe for sourdough bread (I’ve now deviated from Farmhouse on Boone), below is a very rough recipe:
Sourdough Bread Recipe
100g active sourdough starter
330g lukewarm water
480g all purpose flour
12g salt
Mix together into a shaggy ball. Rest for 30 minutes. Do one round of stretch and fold around the bowl. Repeat 3 more times. Bulk ferment until dough has doubled in size (approx. 7=12 hours, depending on how cool or warm your kitchen is). Place dough on very very lightly floured surface to shape. I like to stretch, fold into thirds like a pamphlet, then roll up and stitch the sides. Place the dough into a prepared banneton (or a floured tea towel), so that the stitched side faces up. Place in the fridge at least 12 hours (or 24 hours, the longer it proofs in the fridge, the more sour the flavor). When ready to bake, preheat oven to 450. When oven is at 450, preheat dutch oven for 20 minutes. When dutch oven is preheated, leave it in while you score the bread – doesn’t have to be fancy, but at least do one long line off to the side for your expansion so you limit your loaf from splitting. Remove the dutch oven, place your loaf in. Bake for 35 minutes lid on. Remove lid, bake for additional 15-18 minutes. Cool completely on a rack before slicing.
