Now you’re probably wondering from my last post, WHY would you take the time to make your own tortillas?
LOL sorry, all I could think about was someone saying it just like this scene from Gilmore Girls. Any fans? Yes? No? At least go find this episode so you know how you’re supposed to ask me, “Why did you make your own tortillas?”
BECAUSE! 1) I had to redeem myself from attempt #1, obviously, and 2) because I knew I could if I just gave myself the time to do it. Heck, if I can make chocolate babka buns, I think I can manage some measly tortillas.
Now, do you want to know what I made them for? Of course you do! Hint: there’s a clue in the title.
SMASHED BURGER TACOS!!
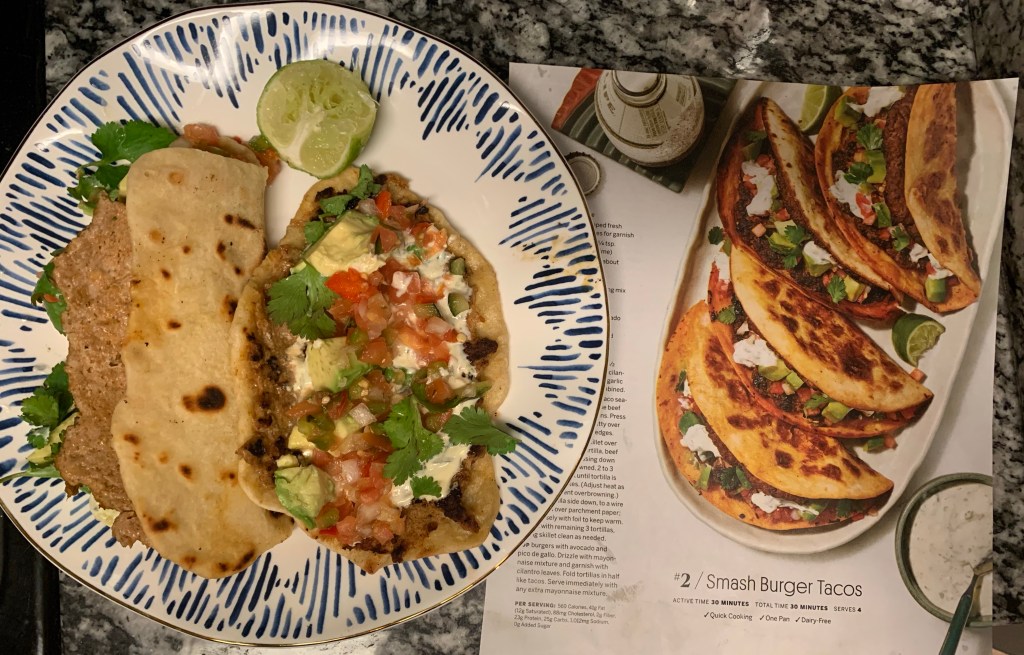
Beautiful plating of recreated Smash Burger Tacos
Okay, where do I begin? Other than this is the only picture I have of this meal (typical). Looks pretty good, right? One would even say reality met expectations maybe?
So here’s the backstory: A few weeks ago I started going through my backlog of magazines to cut up for collaging (a completely different arts and crafts story for another time); well, I decided I would also cut out the recipes I had previously saved. Reader, I had pretty much saved all the recipes, so a lot of these magazines are pretty bare-bones. Anyway, now I have a STACK of recipes. I’m talking about appetizers, dinners, desserts, and drinks. Too many to count.
Well, for another project (don’t worry, I’m getting there), it was a poetry prompt to create alternative New Year’s resolutions. Okay, bet. I decided that I was going to take 5 new recipes that I cut out from my magazines and actually recreate them!! So far we are two weeks down, and I have some yummy new recipes that I cannot wait to add to my rotation.
Circling back, now here we are with my smash burger tacos! As you can tell in the photo, there is a magazine beside my recreated dish. Not all of my recipes I cut out have their photos, or if they do, they are not on the same page (*cough cough* Better Homes & Gardens with their mini recipe cookbook). So far I have made recipes from Real Simple and Bon Appetit.
Now I did stand at the little tortilla stand and debated whether or not I wanted to buy tortillas. Why are there so many types of tortillas? So instead of debating any further with myself, I made the decision to make them.
And well, we know how that went 🙂
Now, caveat with the burger tacos. Firstly, I am now 1-year cow-free (*mostly, except I still have beef bouillon paste in my fridge that I have to use up, and that’s super rare, AND I still eat tons of cheese). So I used ground turkey. Couldn’t even tell a difference personally, because you mix the meat with a full packet of taco seasoning. Secondly, this version is definitely more Mexican-style than American-style. There are, of course, other versions of smash burger tacos out there that play up the American burger.
As I’ve said, I’ve got some more recipes that I’ve recreated. My mom gets a new text every evening I do them, aptly named Expectation v. Reality. Of course, these would probably look a little better if I were a food photographer, but alas, I have too many other hobbies. Maybe I’ll do another post where I talk about those more in-depth instead of just the brief photo op they get over on Instagram.
Did you think I was scared off the last time I made them?
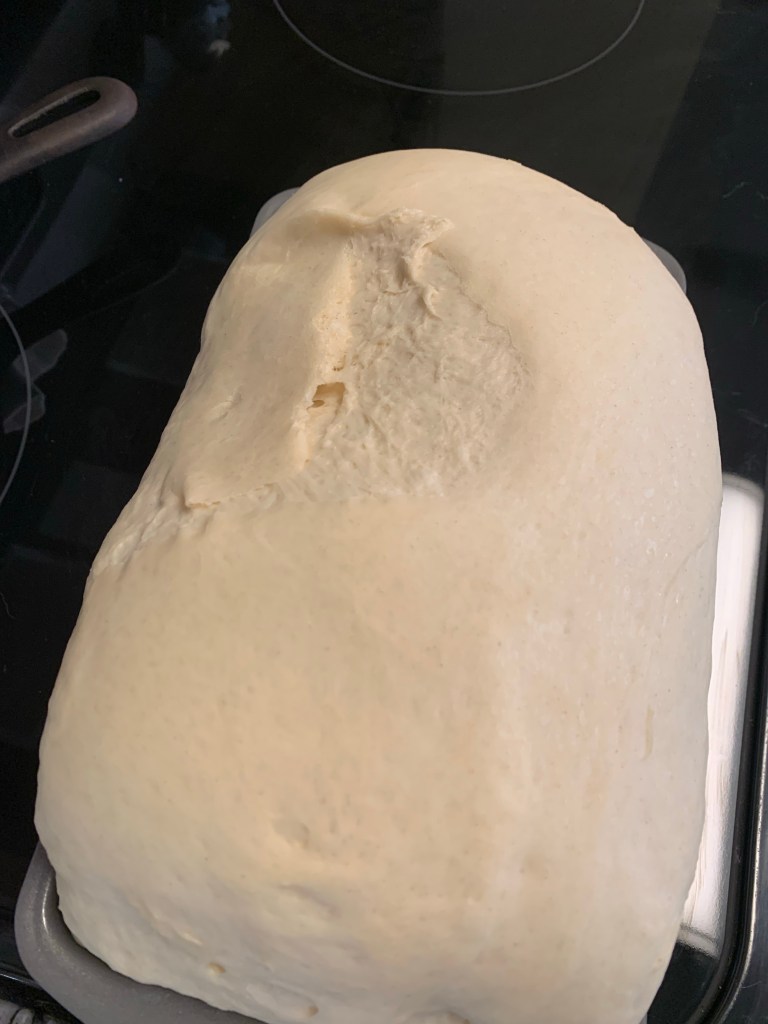
Maybe just a little. But this time I took out the sourdough discard (is that what I did last time?) and just went to basics. And wahoooooooo we have tortillas!
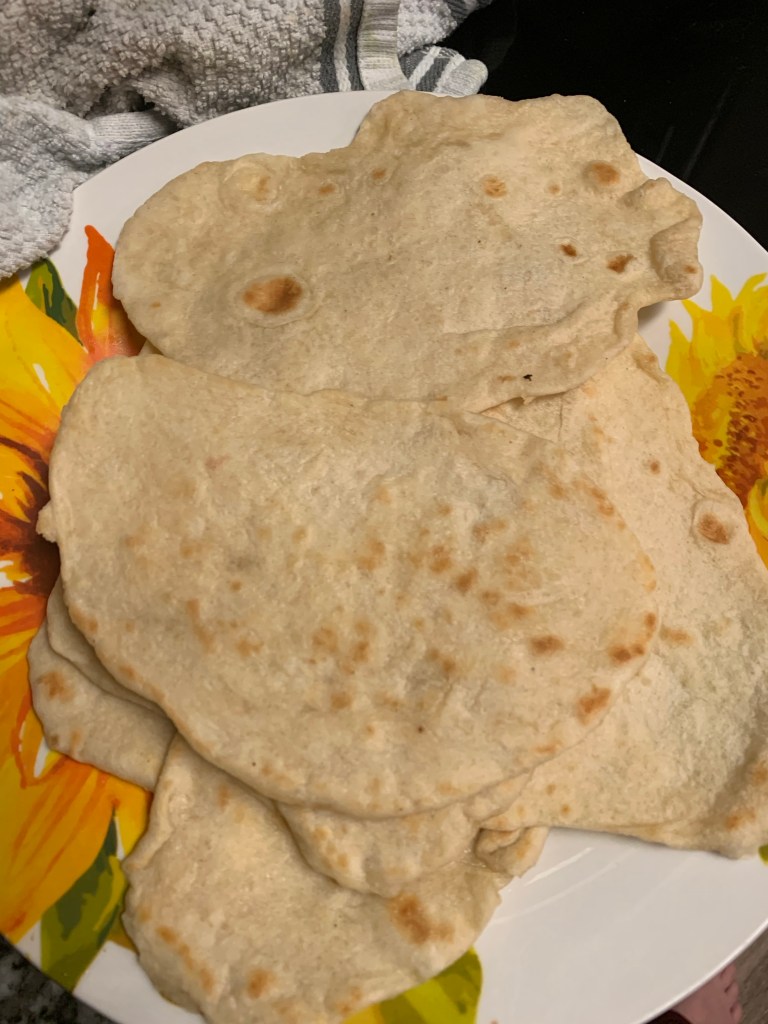
A plate of cooked tortillas
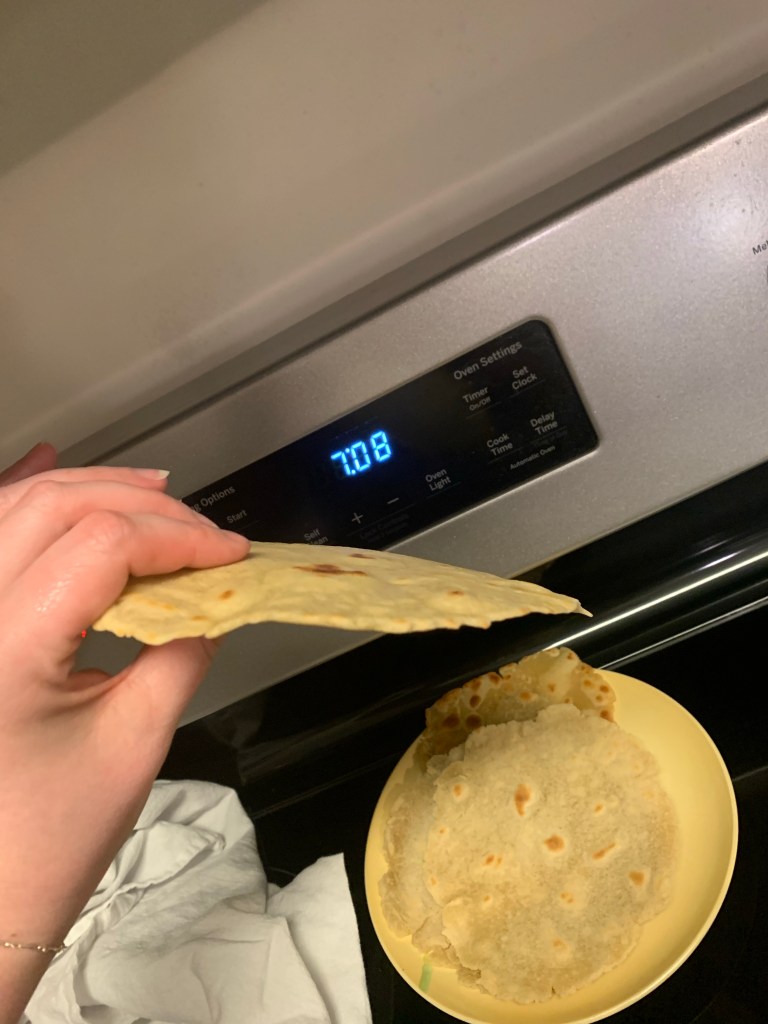
Minus them not being round, you would never think they were homemade!
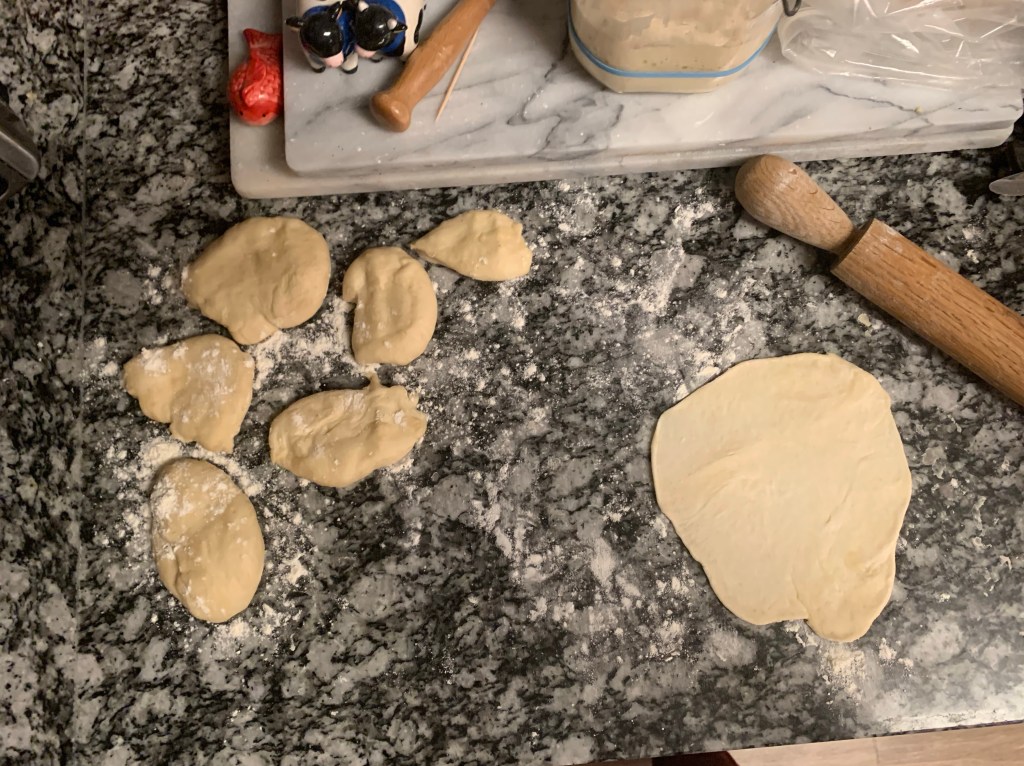
Look at them roll! The key to rolling them was flour! flour! flour! Oh my gosh, when I made the dough, it was so sticky. I actually had to let it rest before I could continue on. Then I cut out my pieces, floured them, covered them, and let them rest. Then rolled them out on a floured counter with a floured rolling pin.
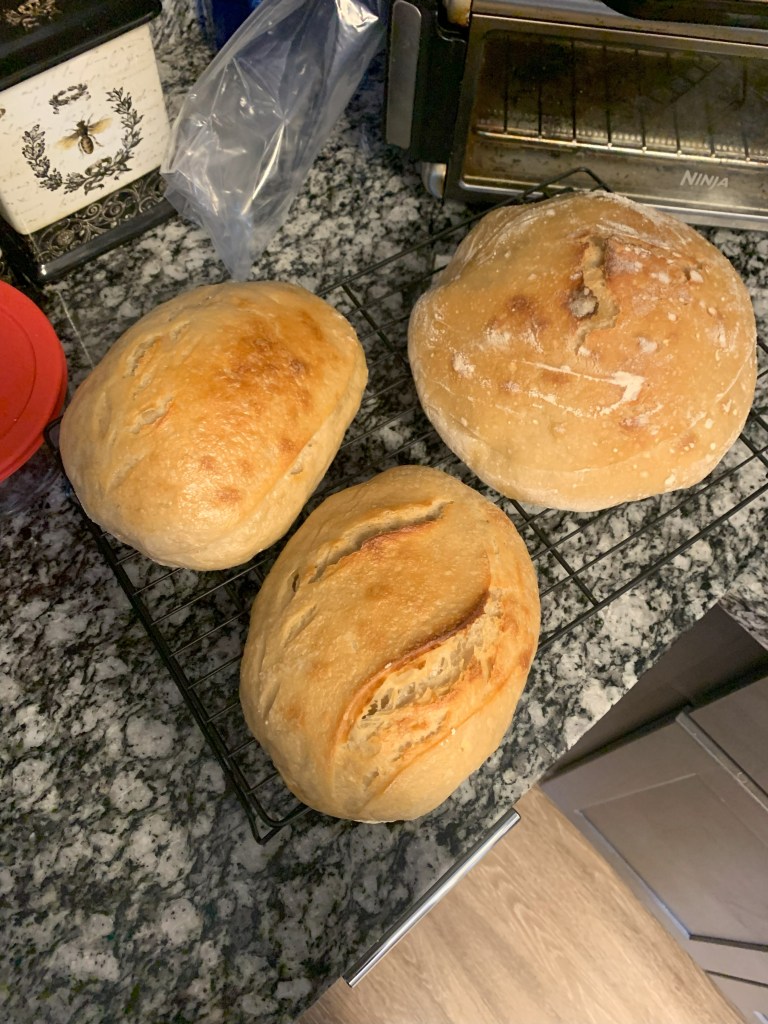
Tortillas preshaped
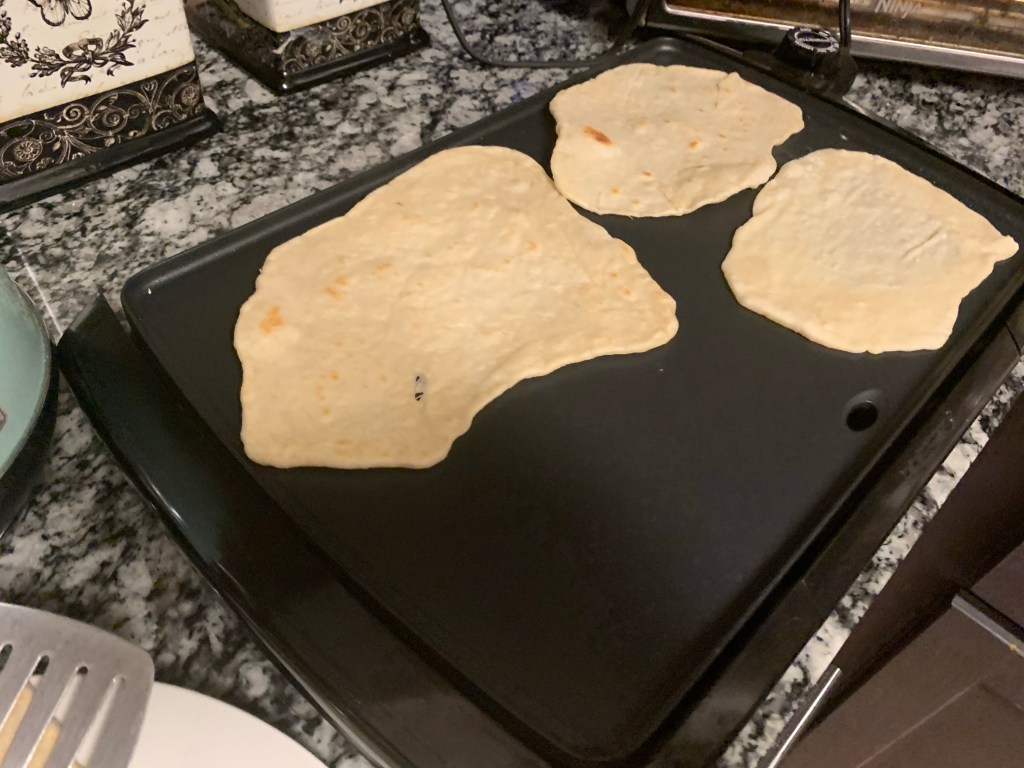
To make more than one at a time, and since the skillet was such a pain last time, I decided to try out the griddle. Pretty sure my griddle is showing its age because I had that bad boy cranked up, and it was still taking forever for them to brown.
Tortillas cooking on a griddle
Here is the ultimate test: the scrunch! I would cry but there are NO TEARS IN SIGHT (ba-dum-tiss).
Tortilla being scrunched without falling apart
Okay, there was a tear-off from the corner because this was my taste tester, but otherwise, these came out so good! I am so proud of myself! I will be making these again and hopefully they will come out a little rounder next time. It only took my homemade pizza about 6 years before it turned into an almost circle.
Let’s talk about everything I made in the last two weeks of 2024 instead of my lofty goals for 2025.
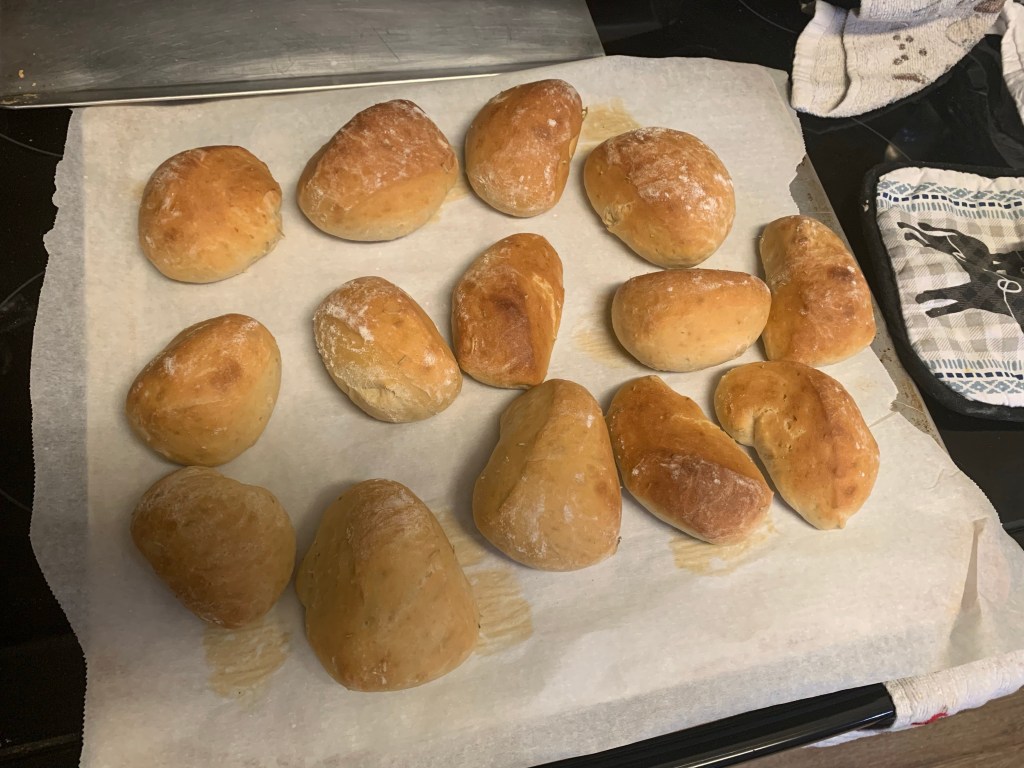
I made these Rosemary Potato Rolls from King Arthur twice. The first time was to go with my Christmas Eve lasagna. The inspiration was the recipe on the back of the potato flour bag. And wow, wow, wow, they were so good. Hence making them twice. I made them again for Friendsmas. The pro move there was to slice them open (still warm, of course), put a piece of brie and prosciutto inside, and add a drizzle of hot honey. And MAN! You are in business. The business of deliciousness.
Potato Rosemary Rolls straight from the oven
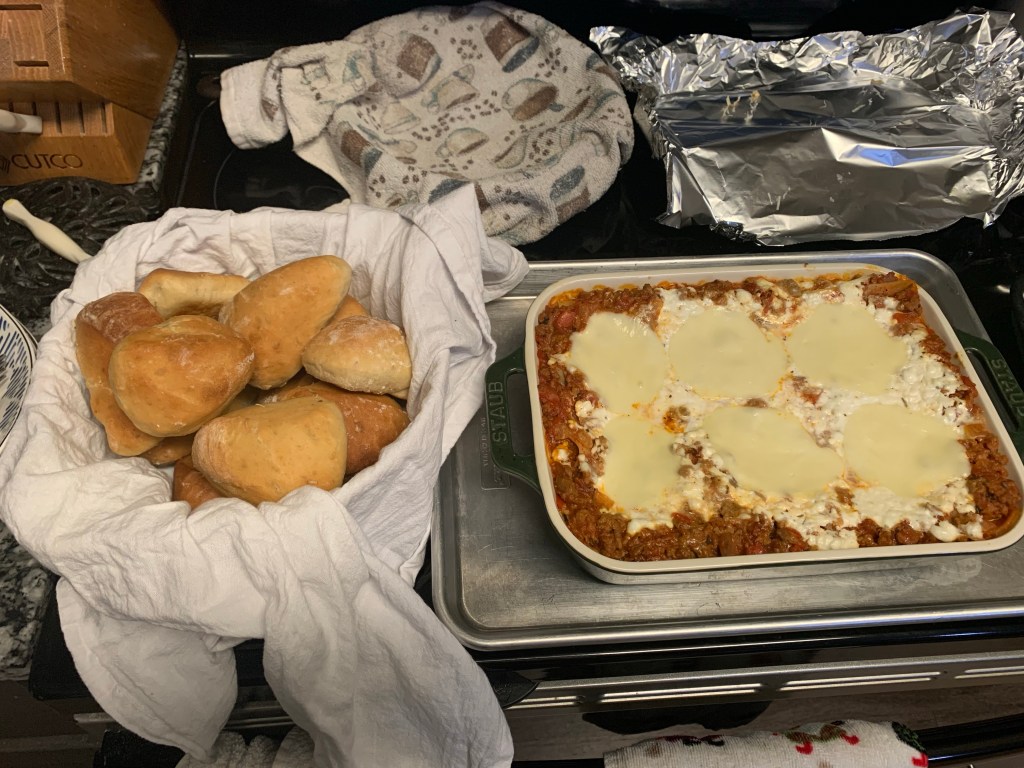
Let me briefly tell you about this lasagna, even though this post is cutely named “Rolling with it”. I got this lasagna recipe from a magazine. It uses no ricotta, which is great, because I invited my cousin over, and she does not like ricotta at all. Instead, it uses cottage cheese! Now, of course, me being me, I had to tweak it a bit. The original recipe just called for regular cottage cheese, but that wouldn’t fly, so I seasoned it with salt, pepper, and fresh dried basil. And instead of my cottage cheese going in cold, I warmed it up a bit in the microwave so it got a little frothy and melty.
And speaking of melty, those pools on top? Slices of mozzarella! Not only were they on top of the lasagna, but also in the middle! Don’t worry; there was enough of everything leftover. I made a tiny lasagna to put up in the freezer.
A bowl of rolls beside a pan of yummy lasagna
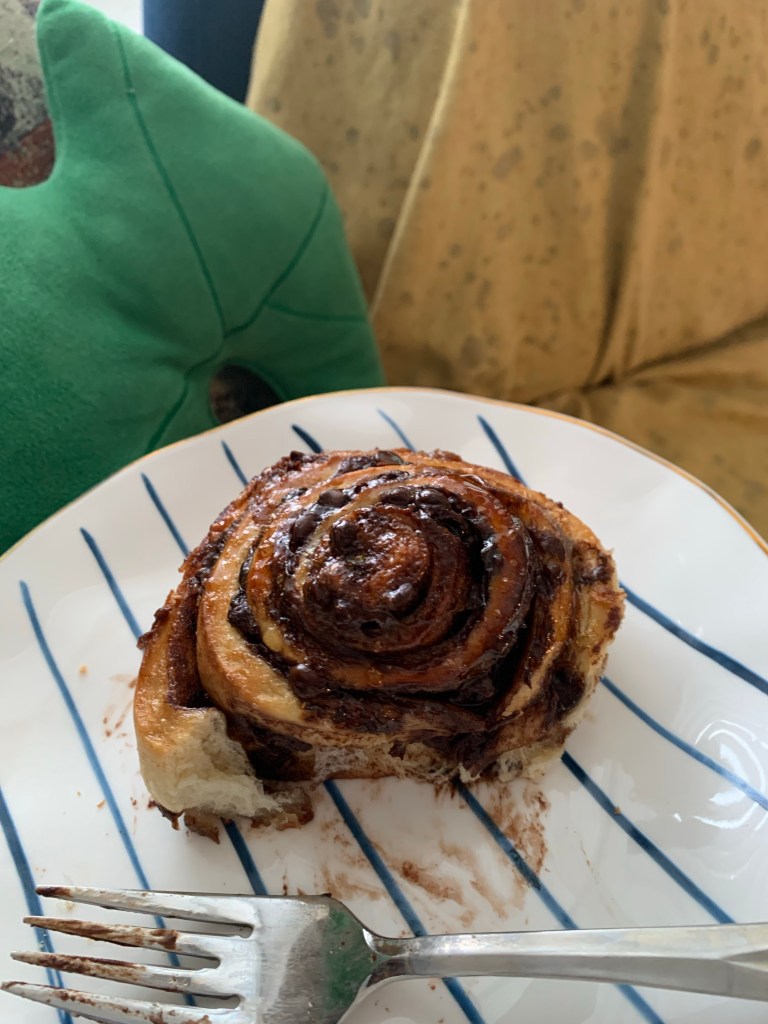
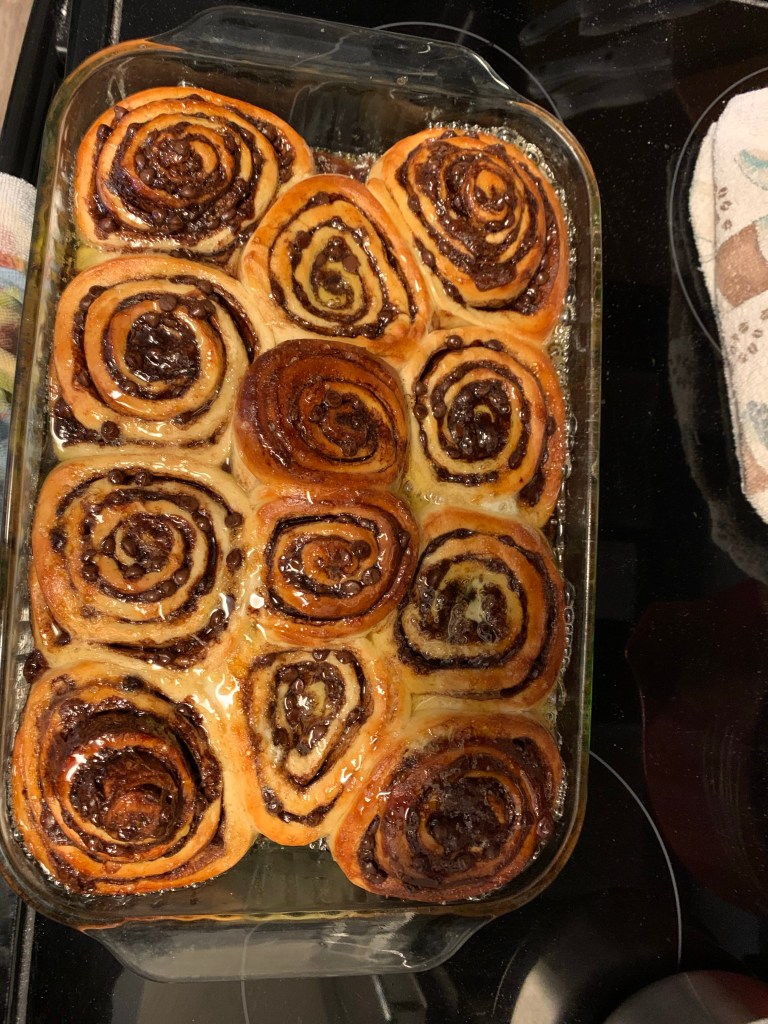
Now traditionally, I make a french toast casserole for Christmas Day, but there was a slight change of plans this year so I was unable to do that. Never fear, dear readers. I made up for it because after Christmas I made King Arthur’s recipe bake of the week features for Dec: Chocolate Babka Buns. OMG.
Please look at this chocolate perfection. It was a bit of a process, but it was so worth it. We ate them for 3 days straight.
Singular Babka Bun
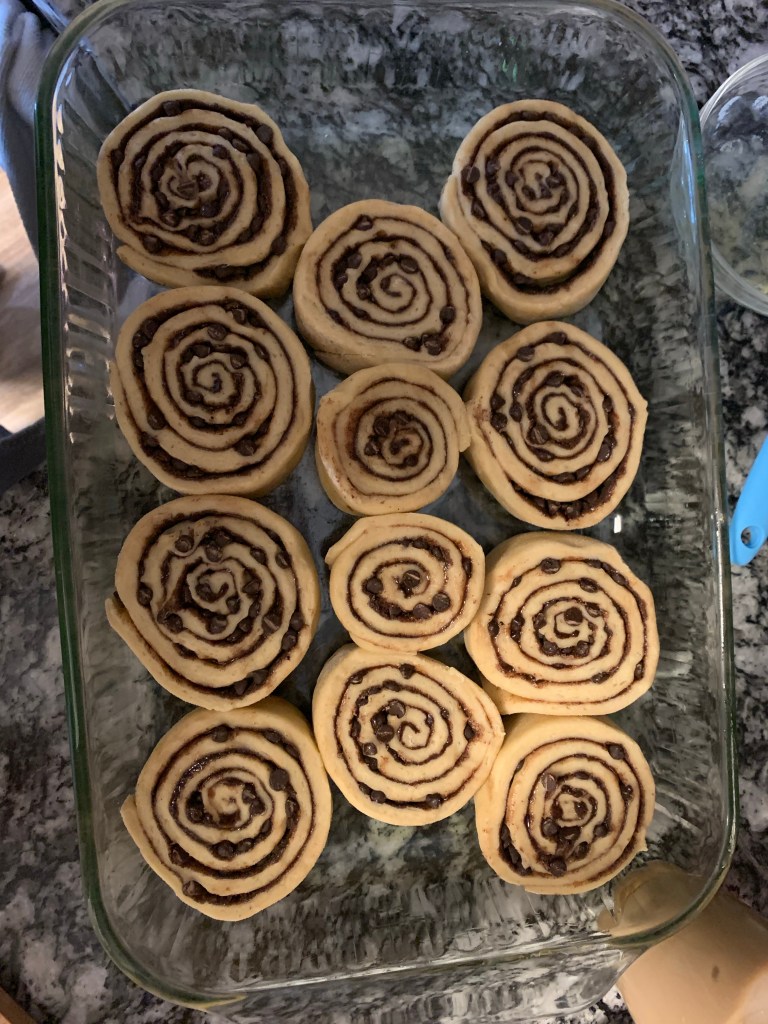
I was smart and made the dough the day before, and then the day of, I rolled it out, filled it, shaped it, cut it, and waited forever before I could eat it. Making the dough ahead of time did help though. I will say it was maybe a tad tight while I was kneading it in the mixer and probably could’ve done with a pinch more milk. But overall they ended up rolling out just fine.
Rolled, but unbaked Babka Buns
I mean, you can’t even tell there were any issues! Look at those swirls!! Take that bakery cinnamon rolls!! I am a true wunderkind at rolling. And do you want to know what makes them so shiny? It’s a delicious sugary glaze that’s been infused with orange zest. DROOL. You have the hint of orange with the chocolate, plus the filling. OMG. Maybe I should make them again this weekend…
Baked and Glazed Babka Buns
So here is where I should probably maybe potentially set myself some goals for the new year, but as we are aware, I am not too good at doing that. So instead, I’m just going to hope for the best, and I will see you when I see you. I will say that I am feeling pretty confident with the writing and the baking, and I may or may not have added a few more arts and crafts and hobbies to my repertoire that I could blog about. I am brimming with creation.
Okay, the recipe you’ve all been waiting for (except for you mom, I’ll work on a cinnamon raisin *kisses*).
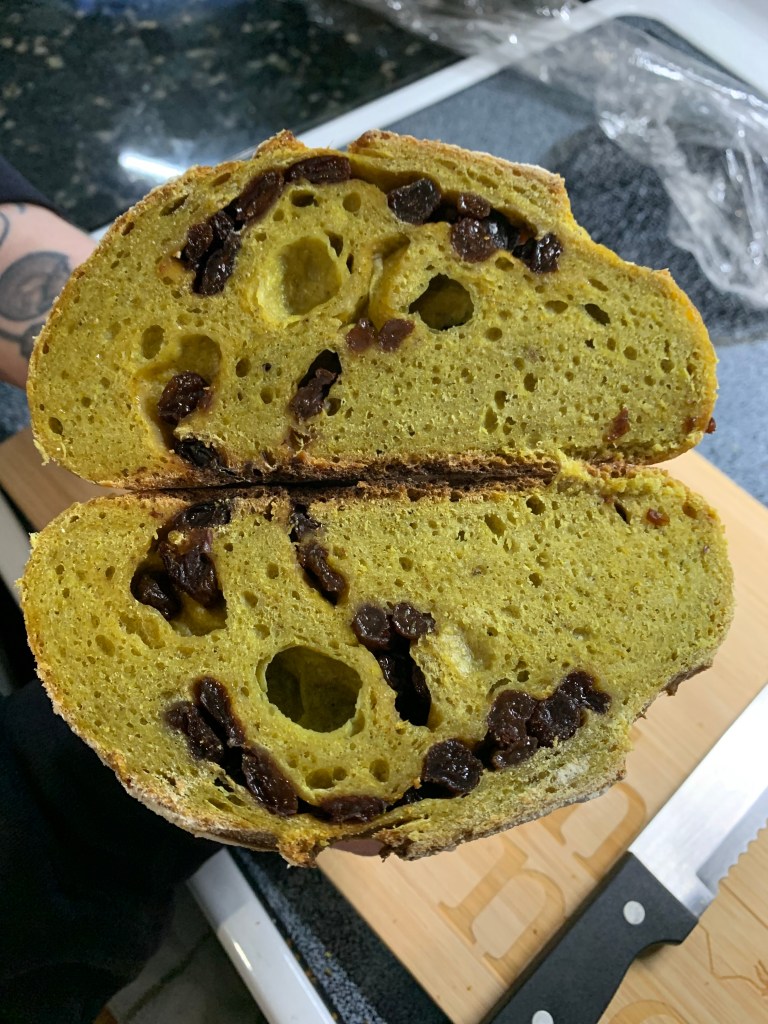
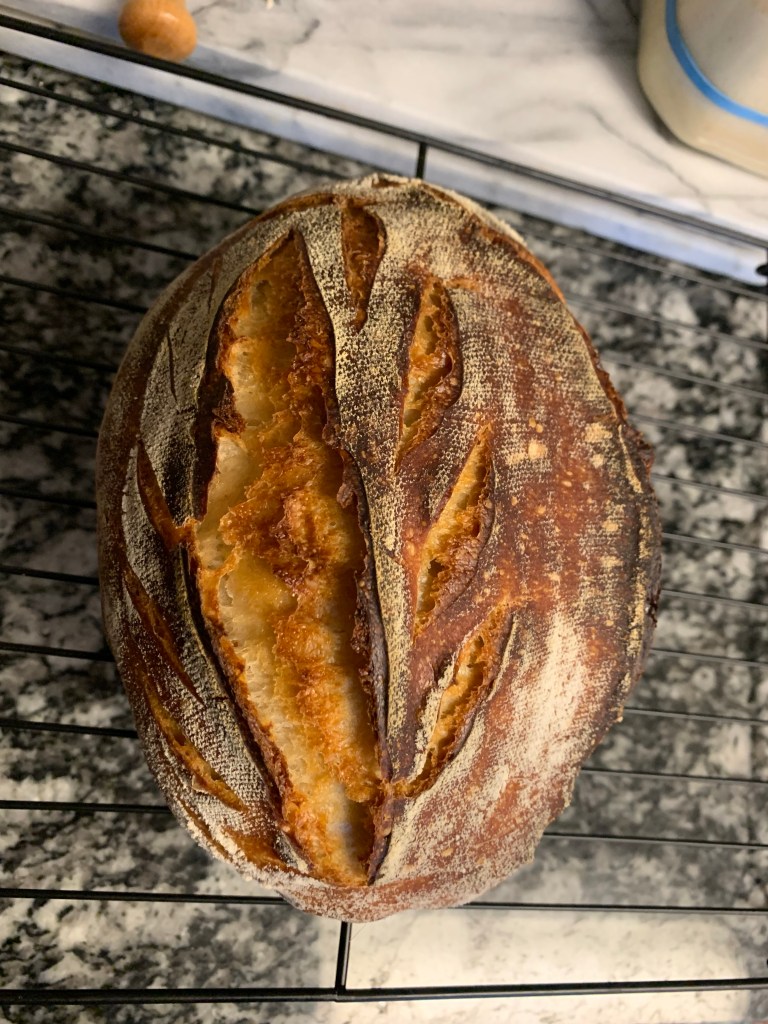
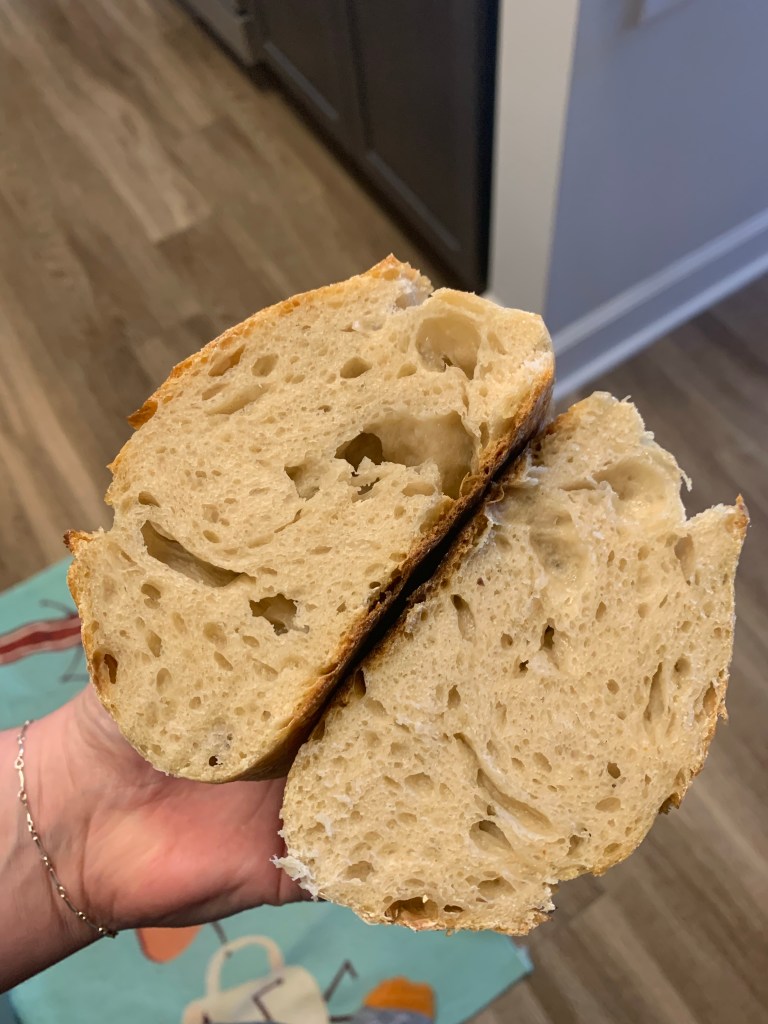
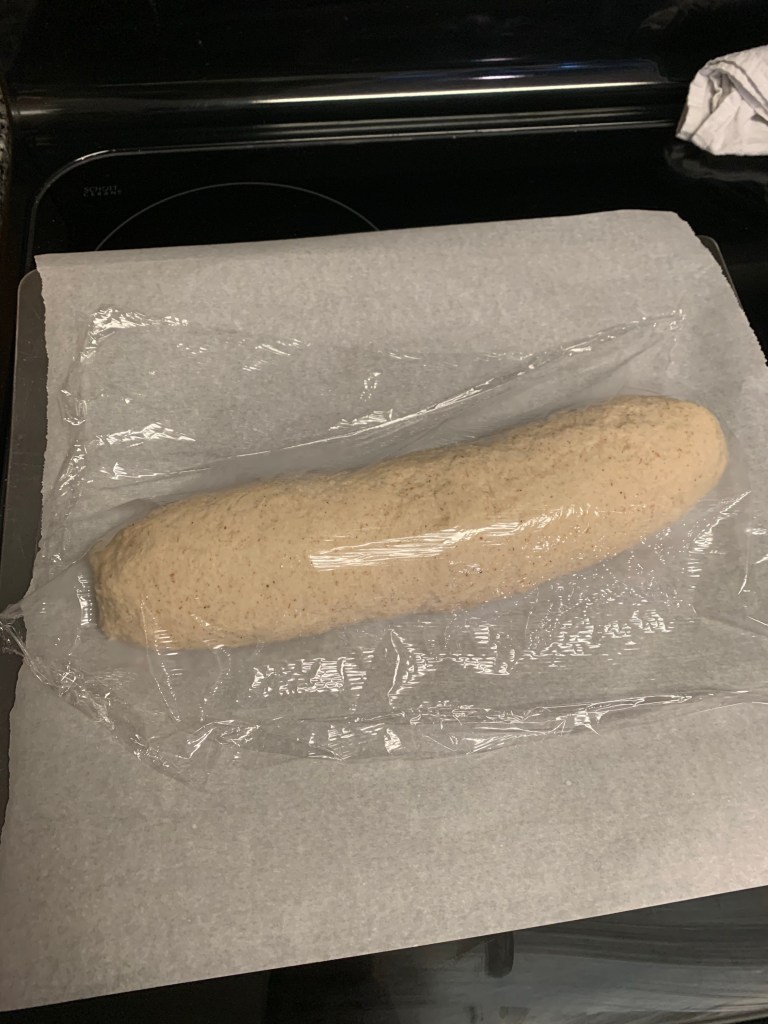
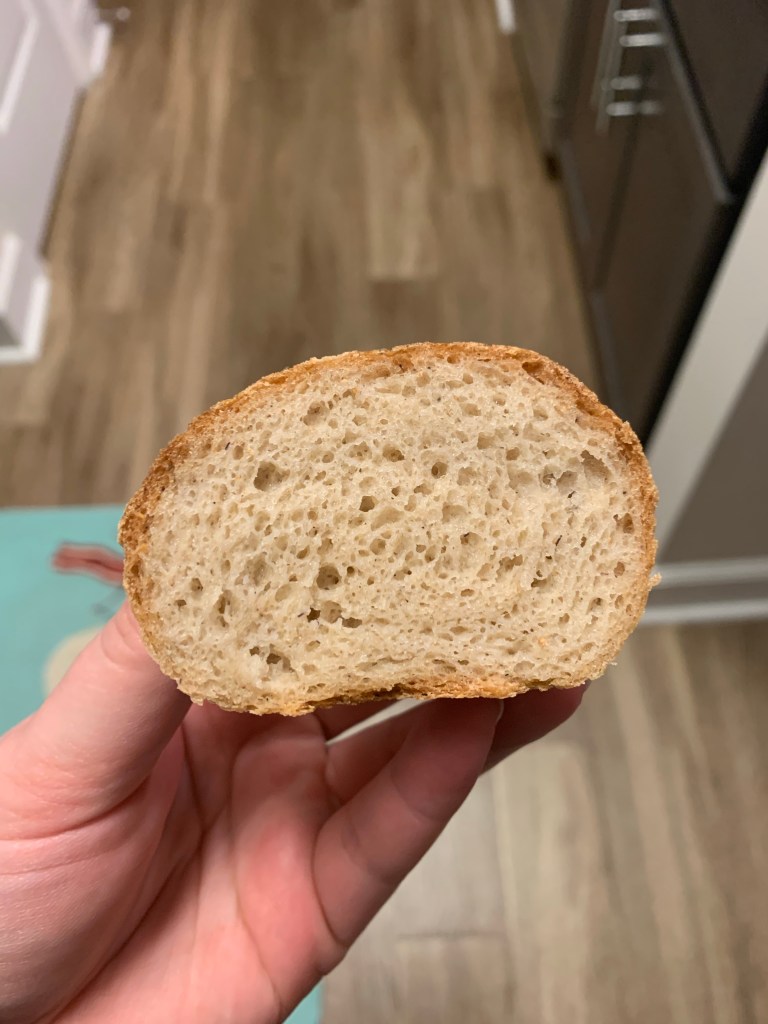
First, here is a cross section. And boy was I worried, because you should’ve seen the plain sister loaf. Not what I wanted at all.
Curry Raisin Sourdough cut in half
So I would say it isn’t the best? I’m not an expert; there’s always room for improvement, but after the failures I mentioned in my last post, I will take it. Of course all loaves will be different based on a variety of factors (your starter, humidity, water temperature, etc), but the goal is to get continuously good and consistent loaves.
So, if you want to know how I made this loaf, I had to base it off the last time I made it–which is based off the bread we made at the bakery (not a sourdough). I obviously made some tweaks because the first time my starter was not as mature and it was not happily fed.
Here is the most recent process. I will also tell you what I did the first time because that loaf also came out deliciously: Take 80g starter and 319g of water (temperature being cool to tepid). Mix that thoroughly together. I like to do this in a glass bowl so I can see what my dough looks like on the bottom. I used a mix of bread flour and all-purpose flour this time around, but when I first made it, I did not. Add in 280g Bread Flour plus 200g AP flour, along with 14g of salt PLUS your curry powder. I did 10g. My curry powder is just from Harris Teeter. Use whatever you have. Mix your dough together thoroughly until it forms a pretty shaggy dough. If it’s super sticky and not coming together after a few minutes of mixing, add a little bit of flour (I’m talking like a tablespoon at a time). You want a pretty stiff dough. Cover and let it rest for about 45 minutes before you do your first stretch and fold. I like to wet my hand a bit before I go in, and I find that stops the dough from sticking too much. Now you’re going to grab a chunk and stretch it up and fold it over itself. Rotate the bowl and go around. It may feel a little ‘tight’, that’s okay. If that happens, I will pick it up and do the slap and fold method. You pick up part of your dough and gently slap it into the bowl and then fold it down. Don’t really go too long into doing this; just make sure it forms a bit of a ball. Cover and let it rest again for another 45 minutes. You are going to try and repeat this process three more times for a total of 4 times. Do not be afraid if you forget, and only do it 3 times. I speak from experience and do this with all of my breads, they will be fine. After you are done with your stretch and folds, you are going to let it bulk ferment on the counter for a few hours. I do not have an exact time for this because it depends on how warm your kitchen is, or wherever you house your dough. For me, it’s been about 6ish hours from the start of mixing to when I start shaping it to put into my basket. You want there to be bubbles when you look at the bottom of the bowl. If your dough has lost it’s shape and gets very slack, it’s probably been overproofed, and you will need to look up how to turn it into focaccia. Sorry. For those who bulk fermented well, it is time to shape your bread. This is where we will add our raisins. Before you dump your dough out, start by doing a many stretch and fold sequence around the bowl. This will help release it. Now onto your counter, I’m talking the barest of the bare, lightly flour it. Ideally you don’t want to at all, but if it’s a little sticky, it can help so you don’t rip it. Now stretch your dough into a rectangle and sprinkle your raisins. Fold your dough into thirds and add more raisins. Then roll your dough lengthwise (think like a sleeping bag). Now you will seal your raisins in and pull the dough tight to you so that you create tension. Like you would normally do when making a regular loaf. Flour the top and pop it into your prepared basket and stick it in the fridge for the rest of your fermentation process! I usually do about 14 hours for a nice sweet spot. Afterwards you are going to want to preheat your oven to 450 degrees for a long time (like 30 minutes). Then preheat your dutch oven (DO) for 20 minutes. After your DO is preheated, then you’re going to take out your bread and plop it onto your parchment paper and score it. I like to bake my breads with the lid on for 38 minutes and then lid off for 25 minutes. This gives it a great golden crust on the outside, while keeping it nice and moist on the inside.
Okay for those who do not have bread flour, here is my mix I used the first go around: 117g starter (it was runnier, but still bubbly) 485g AP flour 328g water (temperature was still cool) 9g curry powder (I made a note to add a bit more, hence why this go around there was an increase, but you do you boo) 14g salt
Now my dough was sticky to begin with, but it did get better. The process afterwards was pretty much the same!
And voila! Hopefully you have some delicious curry raisin bread. Please let me know if you try it and if you like it. Let me know if you try it and this process worked or didn’t work. I’m always up to hearing how things go. Or didn’t go.
Look, I played with your heart in letting you think I would maintain this blog throughout the year. And I’m sorry I failed you. Again. But I’m feeling better about some things. I’m back to writing on the side—true writing, not blog writing (sorry to blog writers; this is real writing). So I think I feel ~okay~ enough to get back into this. And maybe dial it down with the need to try and tell you about everything going on with the world that I’m interested in. Maybe.
So let’s start with bread. And Brad! True to my word, I have been making bread for my husband’s lunch every week. I don’t do it every Sunday, but it does get done. There was only one week I didn’t do it, and that is because I was on family vacation for two weeks while he stayed home to work. Sorry for him.
Anyways, I’ve tried a few different sandwich loaf recipes. Now I’m making a Subway-style Italian loaf. So good. At some point I want to make ciabatta. I think that would be good.
For the upcoming holidays, though, I have set myself up to bake sourdough loaves for everyone. Now, it’s been a hot minute since I’ve made sourdough loaves. Because it got to be too much bread for the both of us (insane, I know. Too much bread? never heard of it.) So I stopped making the sourdough loaves, and wow, that was a muscle that needed to be worked.
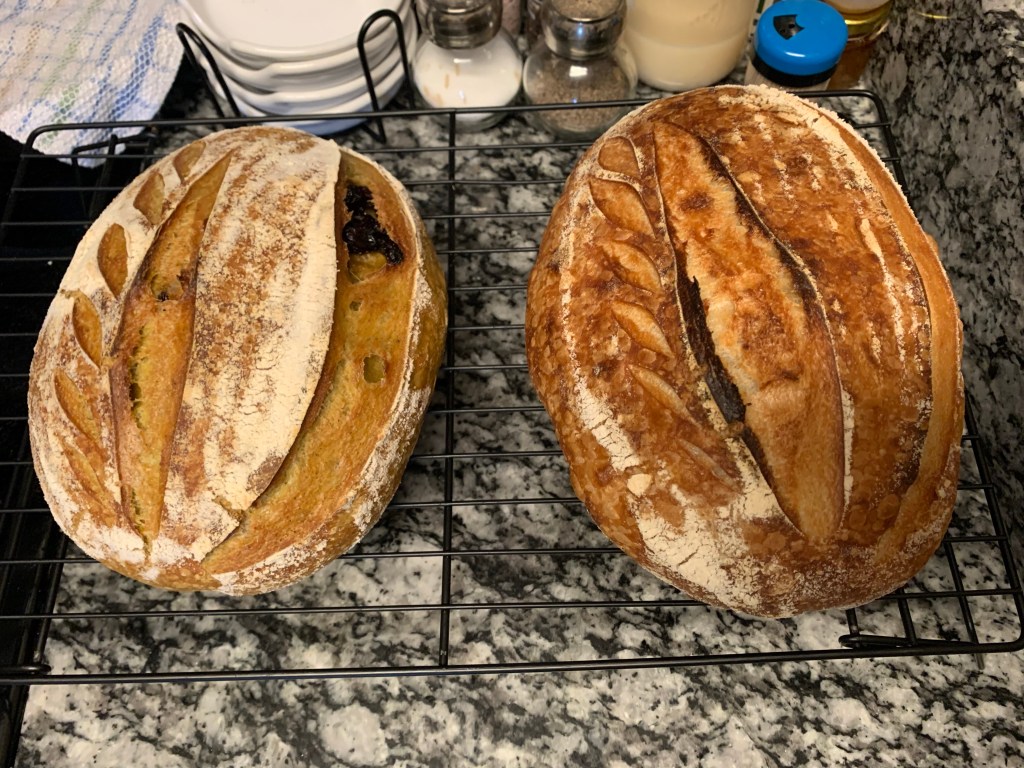
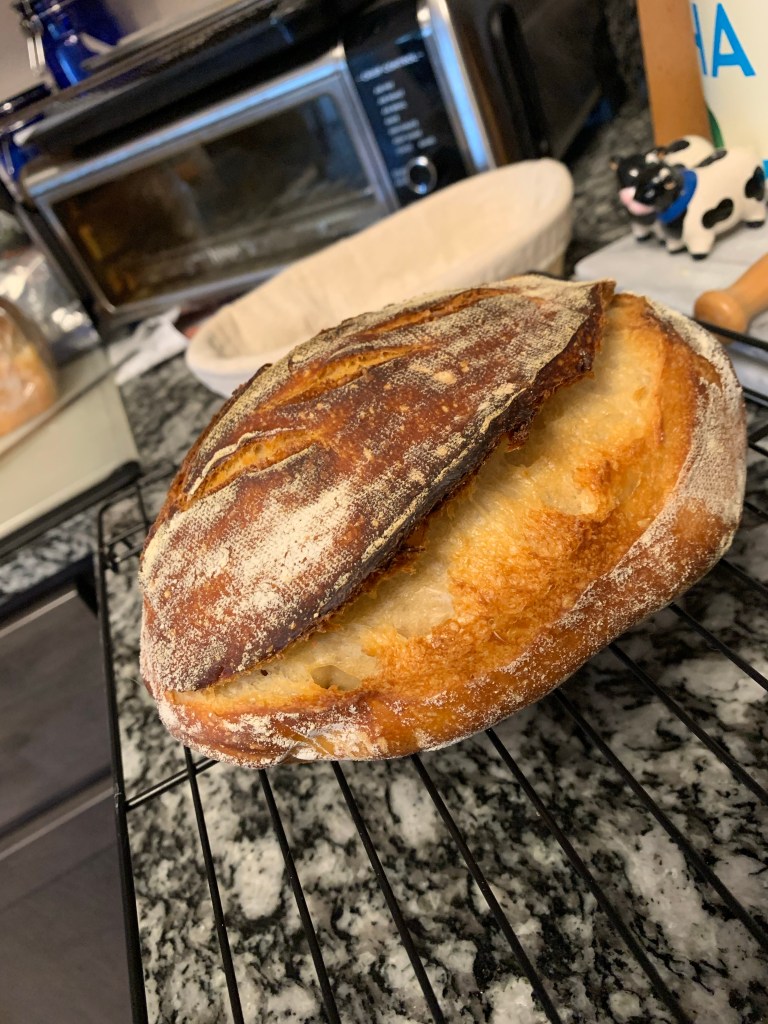
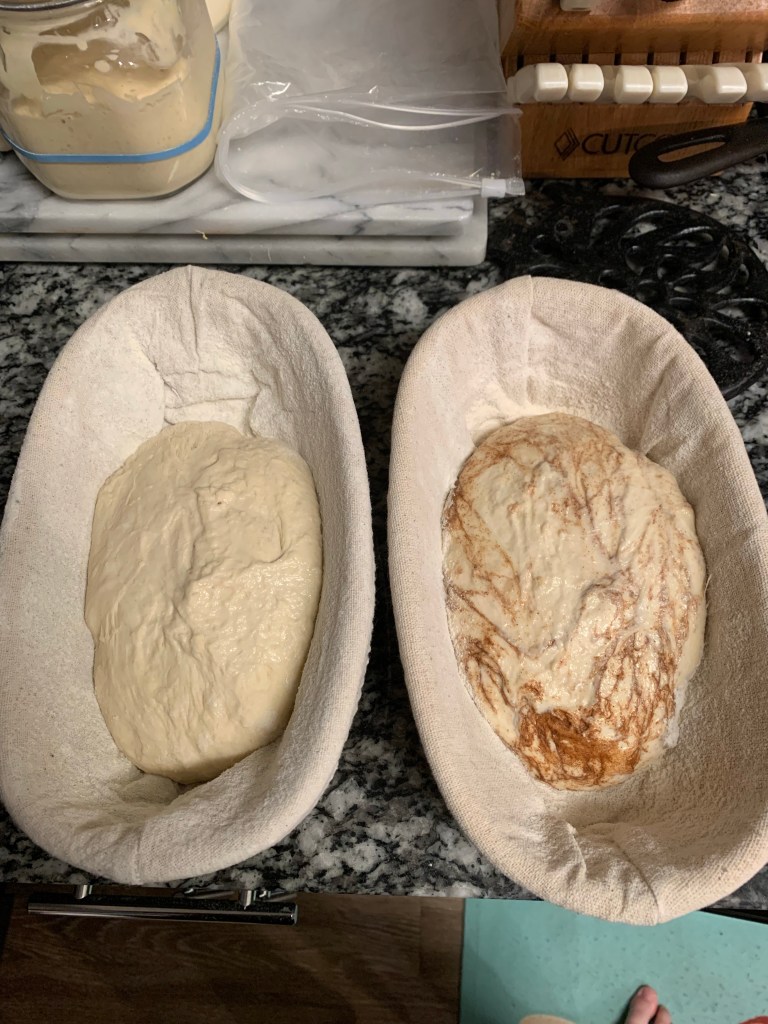
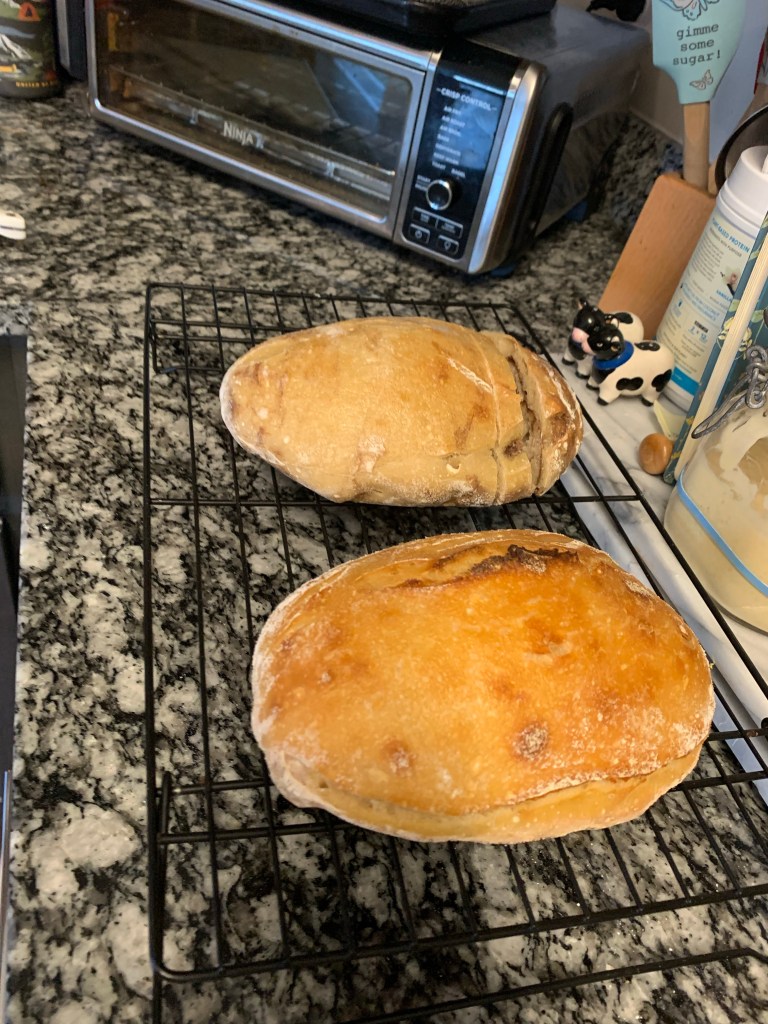
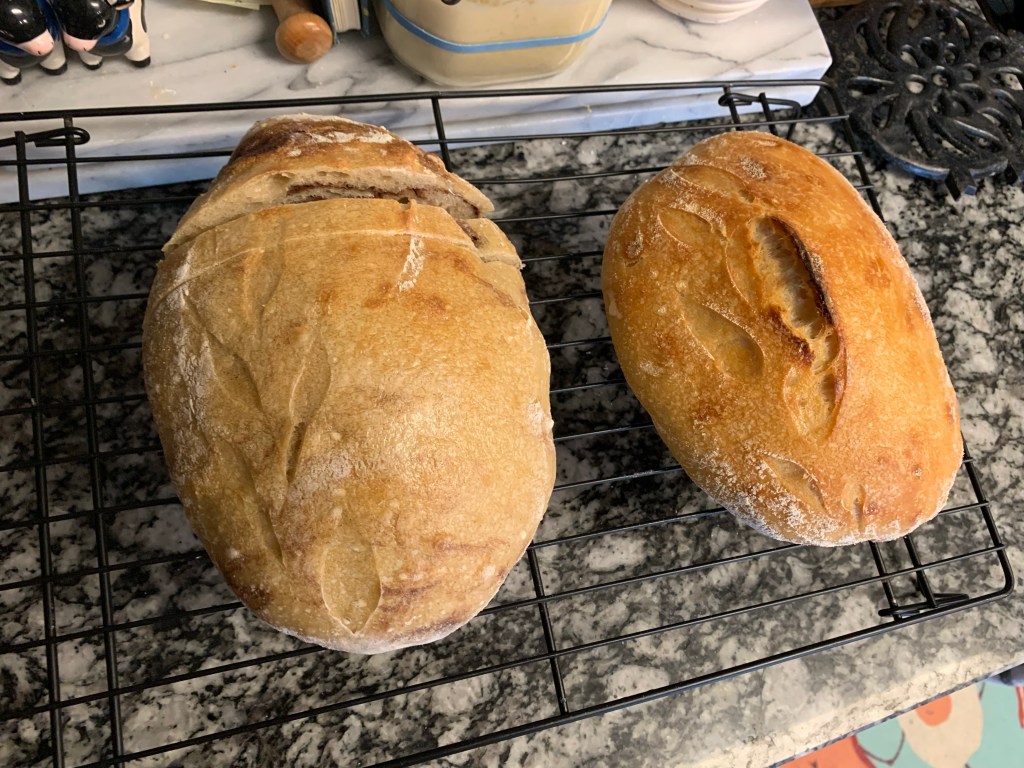
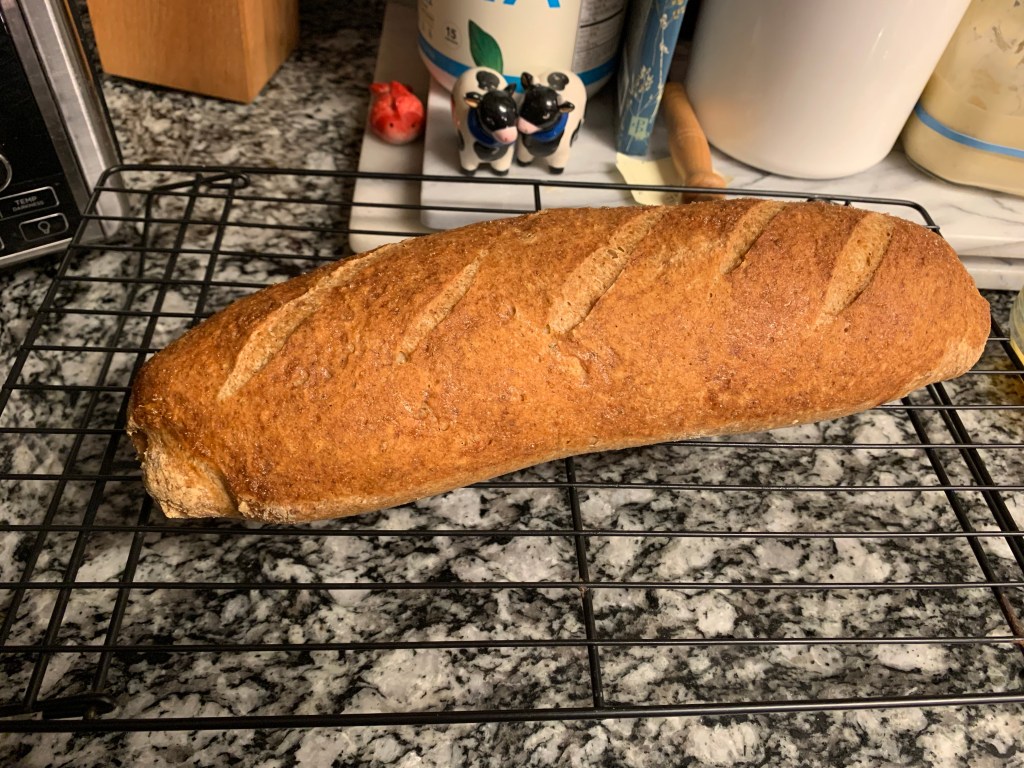
I threw away 3 loaves before I ended up with these gorgeous two.
Two sourdough loaves. On the left is curry raisin and on the right is plain
Please don’t ask for pictures of the bad ones. I’ll tell you what went wrong. Or at least what I believe went wrong. I for sure know the last two were overproofed. They went slack and liquidy, and no amount of added flour and handling was going to fix it. I should’ve turned them into focaccia instead of forcing them into loaves. Please, if you decide to bulk ferment in your oven with the light on, do not do it for long periods of time or don’t do it at all if you don’t know the temperature. IT IS WARMER THAN YOU THINK!
For the first loaf, I think it was too hydrated, and I’m just not confident in dealing with that. Also, like I said, I had not been baking sourdough loaves consistently, so Brad could’ve been sluggish… Think of it like your first pancake. It was about the same in flatness. Except super stodgy.
Oh well, let’s hope these two are as pretty on the inside as they are on the outside because they are going far away from me, and it’s rude to cut into people’s gifts. While I wait, I have two new doughs that are in the middle of stretch and folds and I hope they will also turn out better. I definitely have a better feel for the dough as I remember what I’m supposed to be looking for. Feeling for? You understand. If not, I’m working on typing up a recipe for the curry raisin for some friends, and you’re in luck because I’m going to share it here. For all 22 of you (I think one of them is me).
So TTFN my fellow friends. I will chat with you soon!
It’s been a minute. I have some good reasons! So before I get into it the theme of this post (it’s about sourdough baking of course), we went to New York and we got a dog! So if you can imagine, that’s taken a bit of my time.
So back to the point, I finally decided it was time to actually put Brad IV to work. And I wanted to see if I could hack true sourdough bread. WELL I DID. And I’ve only gotten better.
To begin with, I went with a beginner’s sourdough recipe from Farmhouse on Boone. For the flour, I used King Arthur’s organic all purpose flour. As I said, I wanted to hack “real bread” and I didn’t want the burden of gluten-free flour holding me back anymore. The dough came together easily. I did 4 stretch and folds and bulk fermented on the counter. After bulk fermentation is when you shape and place into your banneton to prove. I split my dough in half so I could experiment. One I proofed on the countertop for about 4 hours and the other went into the fridge overnight.
First roundNight night!
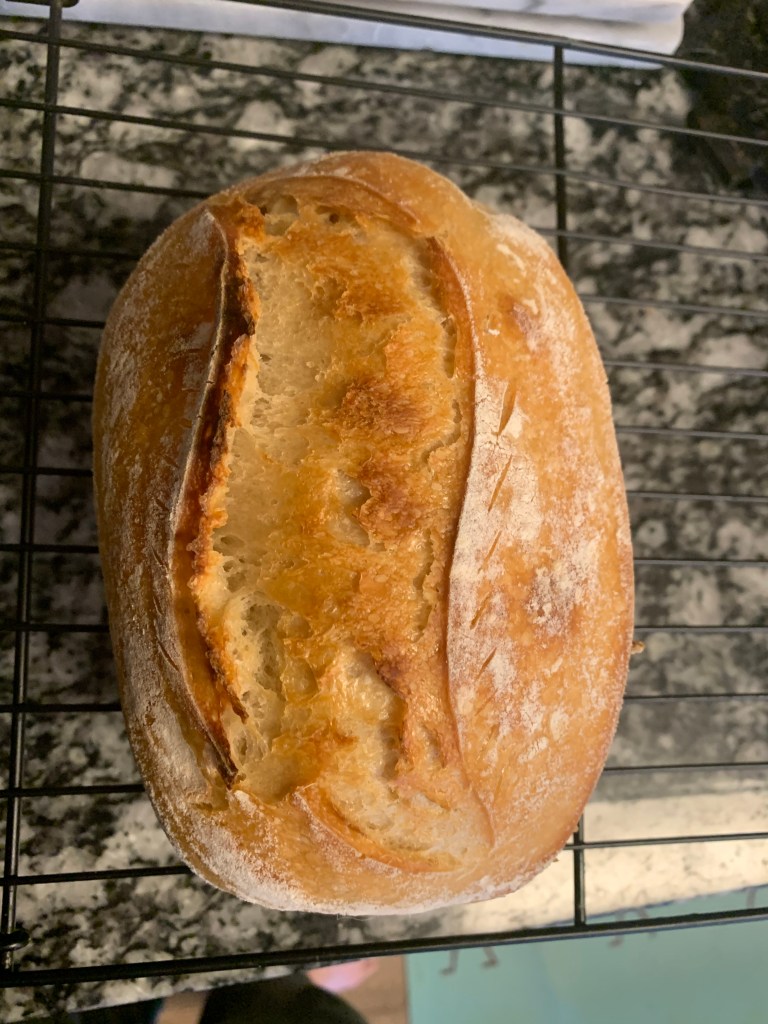
OMG look at that loaf! I follow the recipe exactly and it came out so pretty.
side view of the same loaf
We even have a lovely view of the crumb. The chew was great. My slice was perfect with some butter too. The crust was a little tough for me. So I decided for the next loaf I would cut my Dutch oven preheat time a bit shorter.
Here is loaf two of the same batch. (If I remember correctly…) Everything was the same, except I cut my Dutch oven preheat time shorter. Crazy difference!
The crumb difference is also shocking. Those caverns are pretty huge. The taste was still good though!
Well I was on a roll. So I decided to bake more bread. I was feeling pretty good after that first loaf. I did the same thing and split the dough in half so I could experiment again. I even went a little ~funky~ and added cinnamon.
Round Two
Now I don’t know if you can tell from the photos above, but the loaves are not as pretty and not as defined. My hydration was waaaay off. They were a sticky mess. But as they say, bake the bread anyways!
and end up with some flat pancakes…. I honestly should’ve made focaccia out of the plain loaf. I will say the cinnamon was great! The next time I do a cinnamon loaf, I will definitely add more, because it was good when I had it.
So then it was the weekend before our trip and I suggested to friends and family I could bring them some bread. I don’t know what happened but again my hydration was way too much! I needed to experiment some more and really pay attention to my scale weights.
But you know what? No one complained about the taste – and I think that’s what really matters the most. Fun fact, a large loaf of bread wrapped in tinfoil in your carryon will get your bag flagged and wanded for explosives.
Are you ready for the glow up you never knew you needed?
I totally sliced this before taking a picture lol
So after bring Brad IV back to room temp, I fed him, discarded a little over half, then fed him again and that brought him back to his active self; Producing the glorious loaf above. I stuck to the recipe to a T regarding ingredients, did a preheat of 20 minutes at 450 and did not turn the temperature down after taking the lid off. I have maintained that and have been super satisfied with my crust.
Now how am I supposed to keep this consistency in my loaves but also develop my skills? Well during our trip to New York, we stopped at the lovely Strand Bookstore and came across a bread diary! It literally helps you track everything about your starter, the day you mix your dough, your method, your outcome. It’s so neat, I love it. Which also means I can make a few modifications and figure out what works and doesn’t work and not have to rely on memory about what I did. Which is difficult to do when you have multiple loaves going at once – which I may or may not do…
Okay, here we are I am feeling super confident and playing around with my water and flour measurements but still keeping the ratios the same (no high hydrations for me thanks).
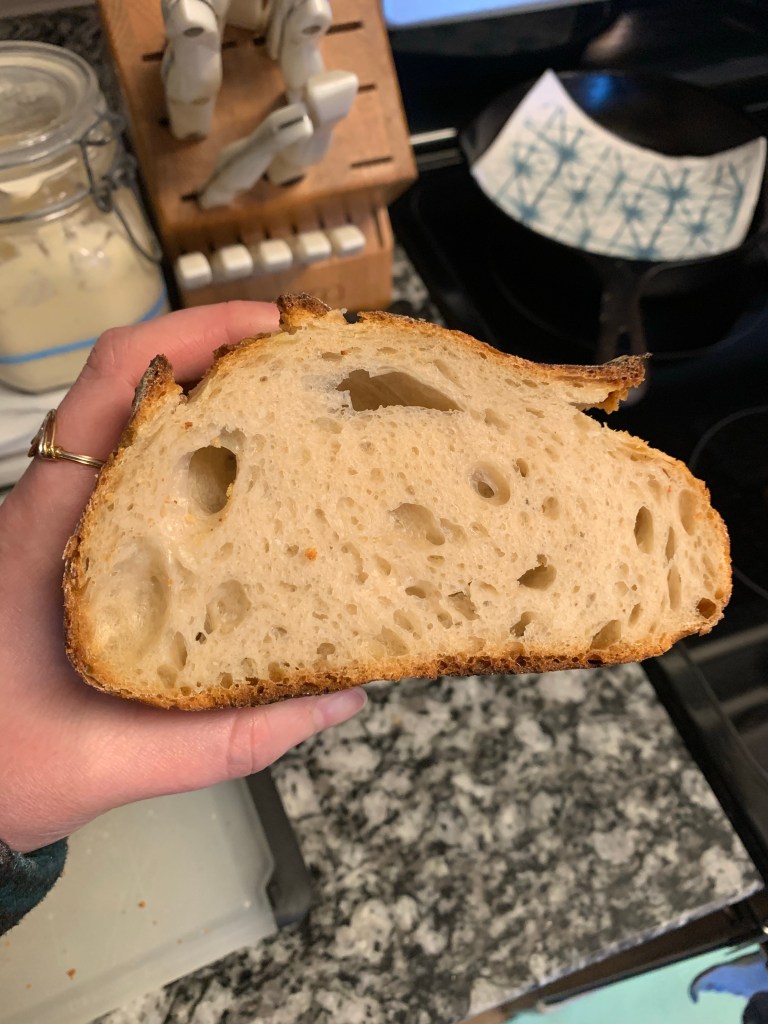
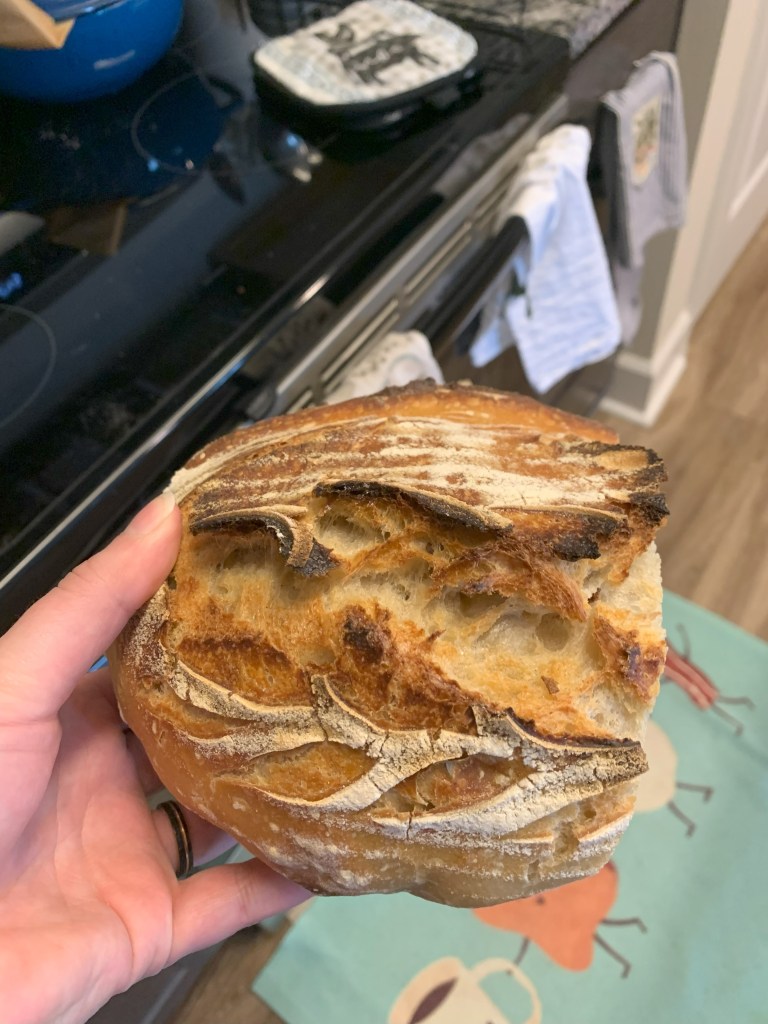
The importance of a crumb shot is to help you determine if your dough was over or underproofed. Of course sometimes that can look the same depending on if you were just slightly over or under. I am not an expert at determining these things. I do know what gummy and dense bread looks like and that is NOT this! So I will say I am on the right track of honing my sourdough bread skills.
I mean look at this. She’s beauty, she’s grace, she’s at least worth $7 in a bakery window depending on if you live in a small town or $15 if you live in California!
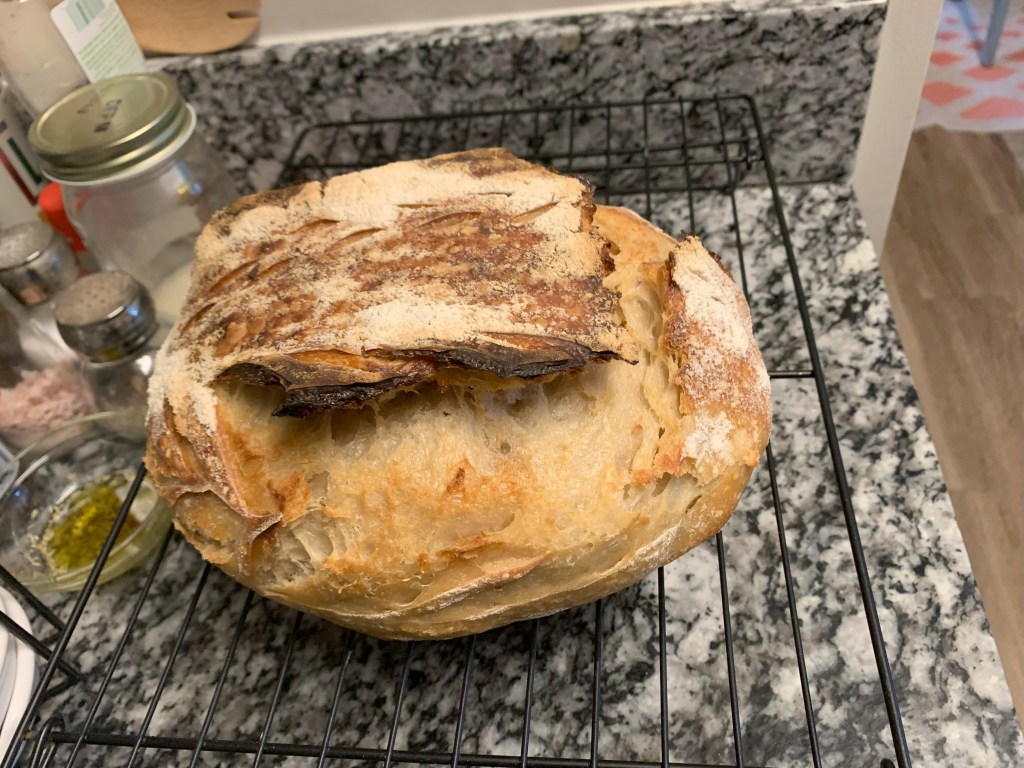
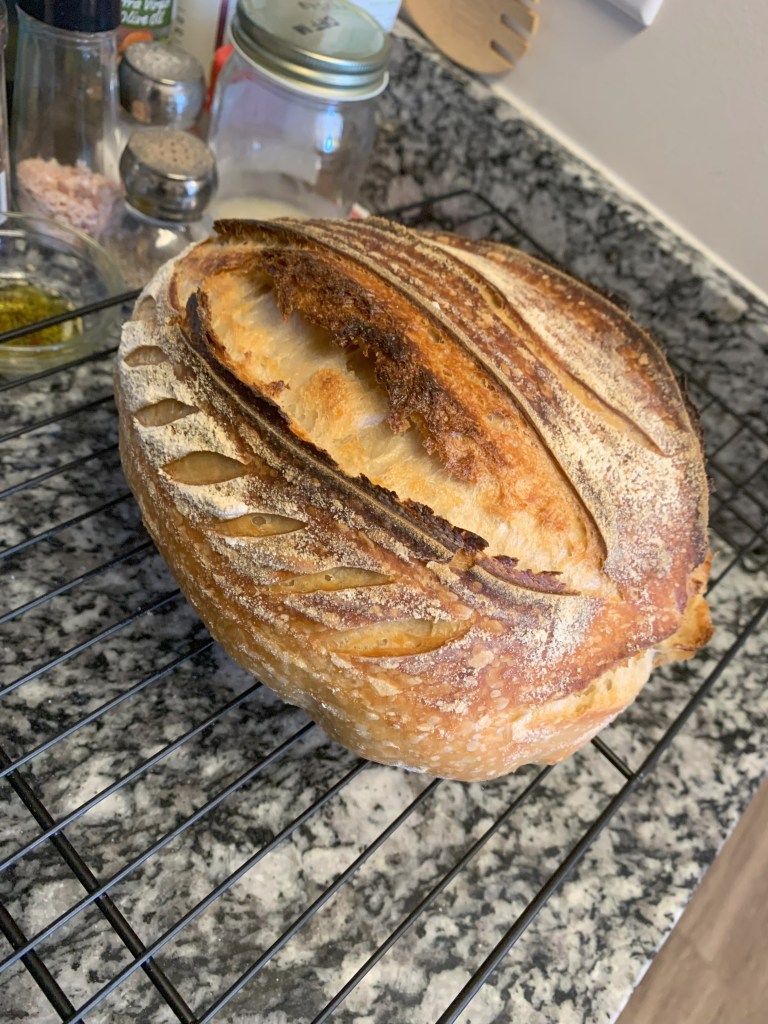
The benefits of mastering your basic sourdough means you can then start adding inclusions. My first inclusion of choice? CHEESE OF COURSE. If you are family or friend, you know I love cheese. Love love love cheese. I do not have a ‘meat and cheese’ drawer in the fridge. It’s a ‘cheese and cheese’ drawer.
Heavenly Cheddar
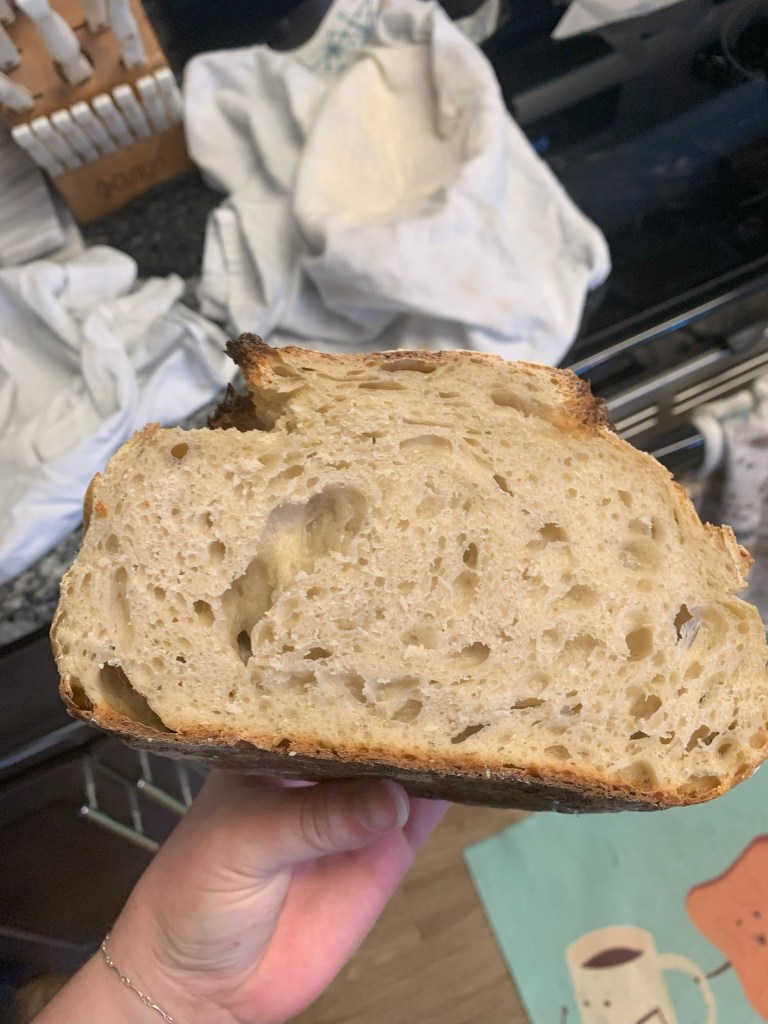
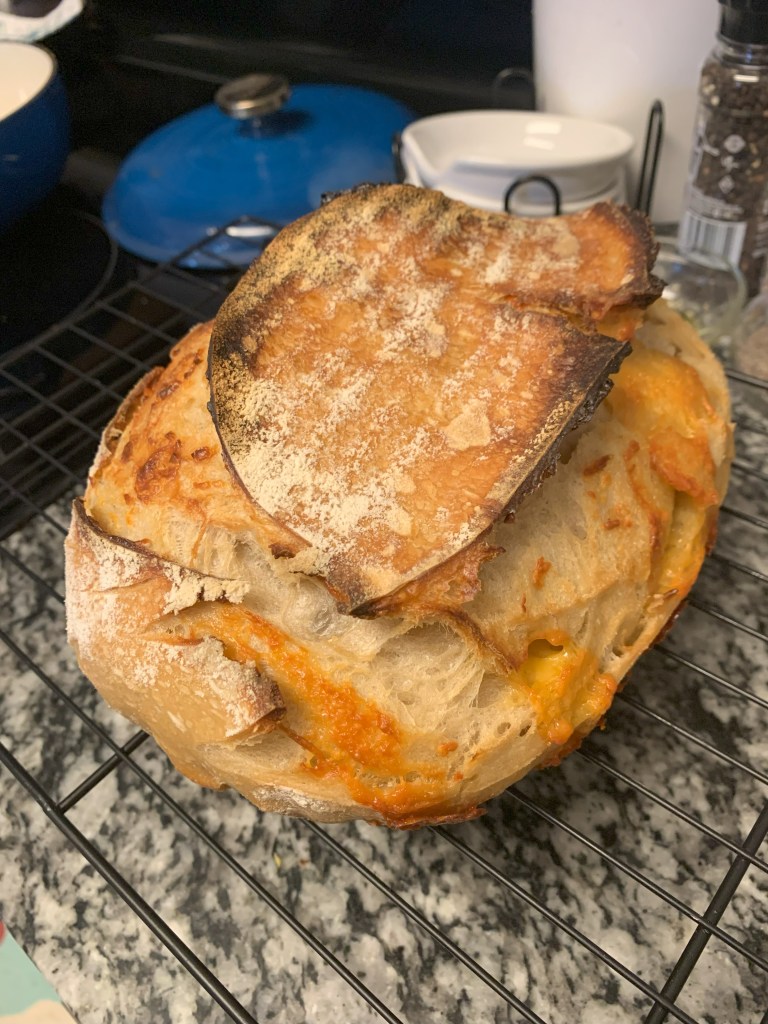
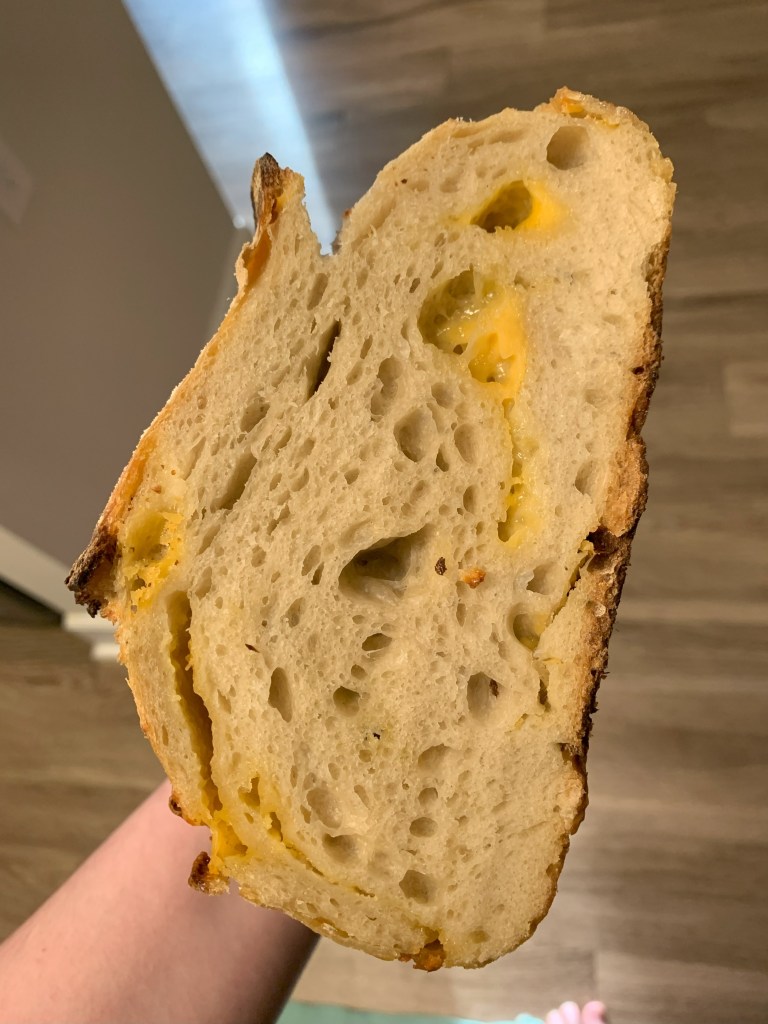
For this loaf, I went with your standard cheddar. First I did my normal dough and bulk ferment. It wasn’t until shaping did I add the cheese. For my inclusion, I did small block, shaved, and shredded variations. It is really hard to tell how much you are adding and how much will actually come through later without making your bread stodgy. Did I weigh out how much cheese I used? No, this was totally eyeballed. As you can tell from the crumb shot, there are pockets of cheese, however throughout the whole loaf it wasn’t as distributed as much as I had hoped. I don’t know if it’s because of how I shaped or if it’s because I just didn’t have enough cheese (more cheese is always the answer anyways, in my opinion). This will definitely be something I will be practicing again.
More cheese please
Well you made it to the end! This of course was not my last loaf I’ve made. I have two cooling on the rack right now. Be on the lookout for any posts I make with fun inclusions I decide to add.
Who knew a little vacation to the big city (and a stint in the fridge) was all you needed for some gorgeous loaves? If you would like my recipe for sourdough bread (I’ve now deviated from Farmhouse on Boone), below is a very rough recipe:
Sourdough Bread Recipe
100g active sourdough starter 330g lukewarm water 480g all purpose flour 12g salt
Mix together into a shaggy ball. Rest for 30 minutes. Do one round of stretch and fold around the bowl. Repeat 3 more times. Bulk ferment until dough has doubled in size (approx. 7=12 hours, depending on how cool or warm your kitchen is). Place dough on very very lightly floured surface to shape. I like to stretch, fold into thirds like a pamphlet, then roll up and stitch the sides. Place the dough into a prepared banneton (or a floured tea towel), so that the stitched side faces up. Place in the fridge at least 12 hours (or 24 hours, the longer it proofs in the fridge, the more sour the flavor). When ready to bake, preheat oven to 450. When oven is at 450, preheat dutch oven for 20 minutes. When dutch oven is preheated, leave it in while you score the bread – doesn’t have to be fancy, but at least do one long line off to the side for your expansion so you limit your loaf from splitting. Remove the dutch oven, place your loaf in. Bake for 35 minutes lid on. Remove lid, bake for additional 15-18 minutes. Cool completely on a rack before slicing.
I did it. At first, I did not think I did, but I was comparing this loaf to a yeasted, higher-protein, non-ancient grain flour. Okay, I may have also slightly cheated, just a teensy bit. Brad IV wasn’t quite as active when I made the dough, so I did add a pinch of instant yeast to help boost. If King Arthur says it’s okay, then I say it’s okay.
I thought it was me, and I had done something wrong. But after going to Jovial’s website and looking up a sandwich bread recipe, I came across their own response to a comment from someone asking if they could use a stand mixer and dough hook (oops): “Einkorn has very weak gluten, and overmixing or overkneading tends to work against it. Gentle and minimal is best.”
Shaggy dough, before it took a turn in the mixer
So needless to say, after learning that tidbit of information, I am actually pleased with how my loaf turned out.
Smoother, albeit stickier dough
They also say that it is normal for their dough to be on the wetter and slightly stickier side and to not add more flour (double oops).
Beautifully proofed YET insanely sticky dough
Oh my goodness let me tell you “rolling and folding” was not happening. There are no pictures of this process because it was a complete mess and my hands were covered in sticky dough. My countertop was also covered in sticky dough. I briefly thought about turning this into foccacia bread it was so wet (again, this was before I decided to read about einkorn flour). I honestly could’ve poured the dough into my pan and probably would’ve had better results.
This dough rose a lot quicker than I was expecting. The recipe called for it to proof for 10–12 hours at room temperature. This would be overnight for me, and the way this thing was rising, I decided to stick it in the fridge for the night. This would probably be considered a third oops. Now that it’s night in the fridge, I have to bring it back up to room temperature and get my oven preheated. Well, in case you can’t tell from it’s rough, textured top, it stuck to my cling wrap!!
This bread was fussy from start to finish, but you know what? The more I ate it, the better it got! Also, the height is pretty similar to most gluten-free breads, so I’m not that mad about it. I will definitely not fault the recipe for all of the flaws and pitfalls I experienced (I will wholeheartedly agree it was user error).
I will definitely try Jovial’s own recipe for their einkorn flour and see if my results match their photos. I will probably try this recipe again and probably use non gluten flour so I know what it’s supposed to be like. If you would like to know what recipe I used, here is the link (Soft Sourdough Sandwich Bread by Lion’s Bread).
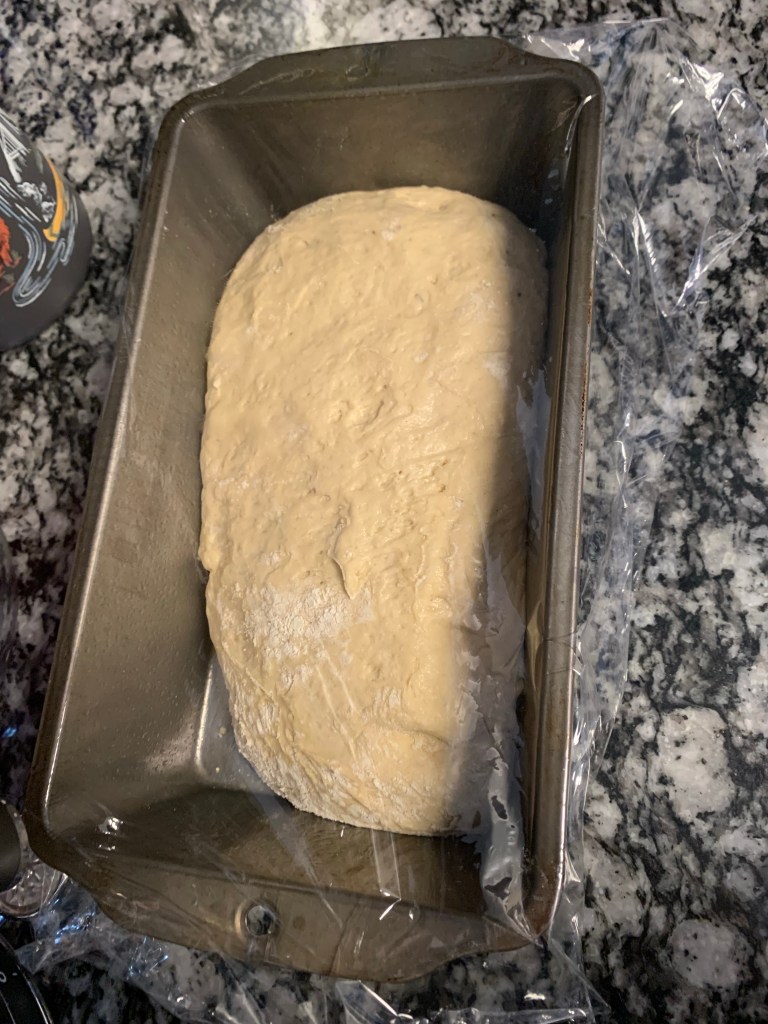
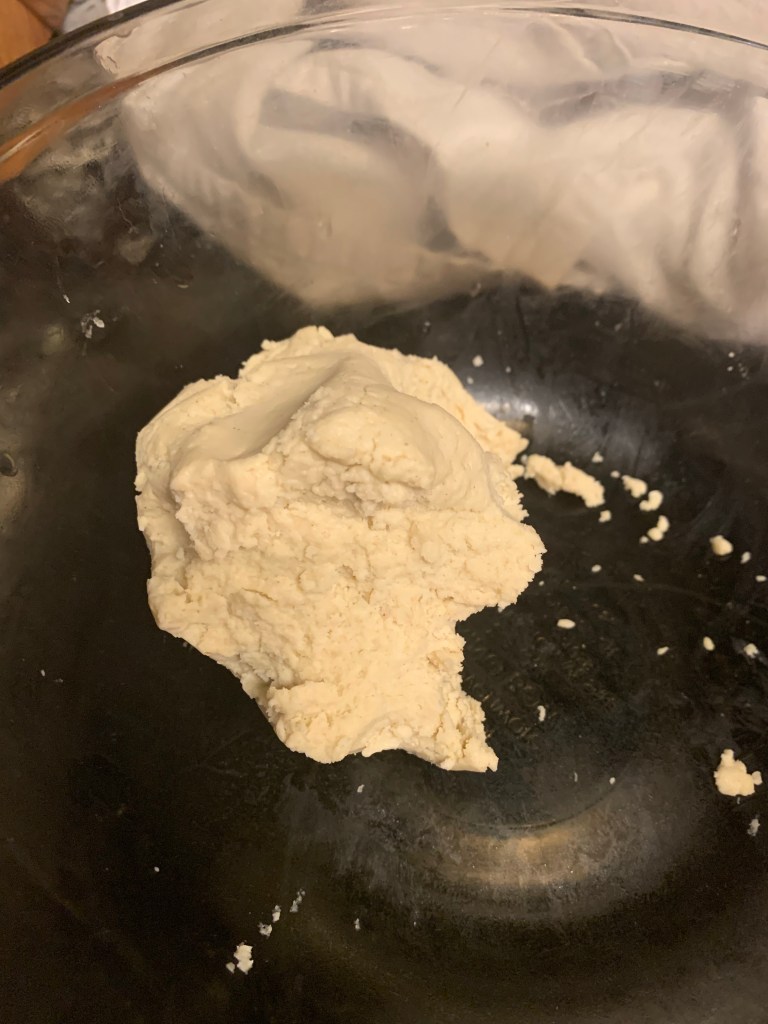
Last night I tried to make homemade tortillas. Keyword is TRIED. Let’s start with the good. Or at least, the sorta good? The flavor wasn’t too bad. That’s it. It was pretty much a fail from the beginning. And guess what, I have photos for proof so we can go step by step and talk about what did not work for me. First off, I decided to use my sourdough to make these – okay shouldn’t be an issue. Well then I decided to make these gluten free. I think that’s where things went wrong.
As you can see from above, my dough (which I had already been pulling from) was not it. I used King Arthur’s measure for measure gluten free flour instead of the all purpose and adding in the xanthum gum myself. Could this have been part of the issue? Maybe. I did add extra liquid to help because the dough was dry.
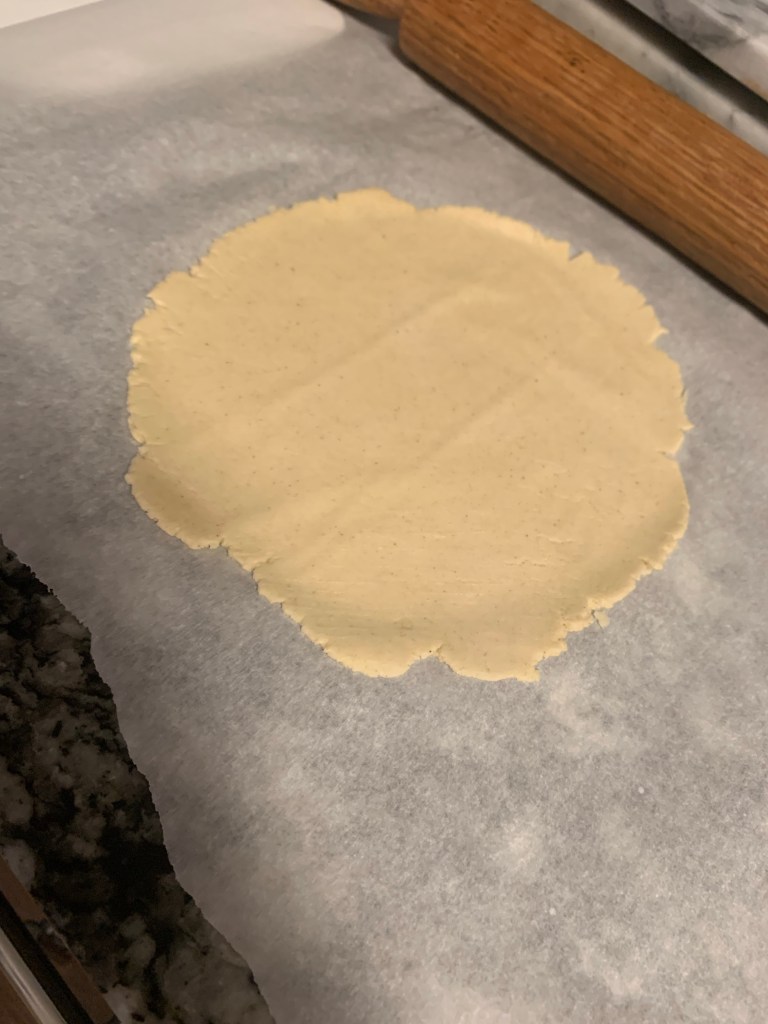
Now it rolled out okay, but not anywhere close to what it should have looked like based on the videos I’ve seen of people making tortillas. I mean, I’ve made homemade corn tortillas before, and they worked better than this! These kept splitting and sticking, but again, they were not really “doughy” like they needed to be. But I was committed.
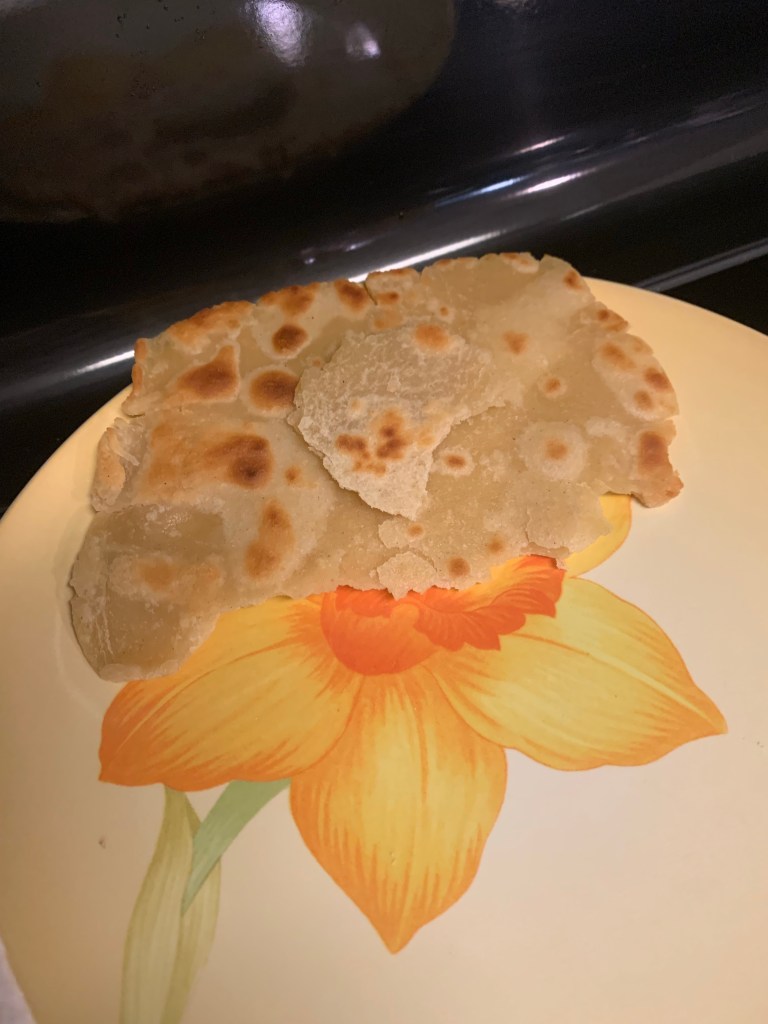
You know what they say—your first one always stinks. That was completely true with my first tortilla. One, I had way too much oil in my cast iron, which was completely my fault and would, of course, skew the results if I was compiling data.
A sad, greasy little tortilla on a daffodil plate
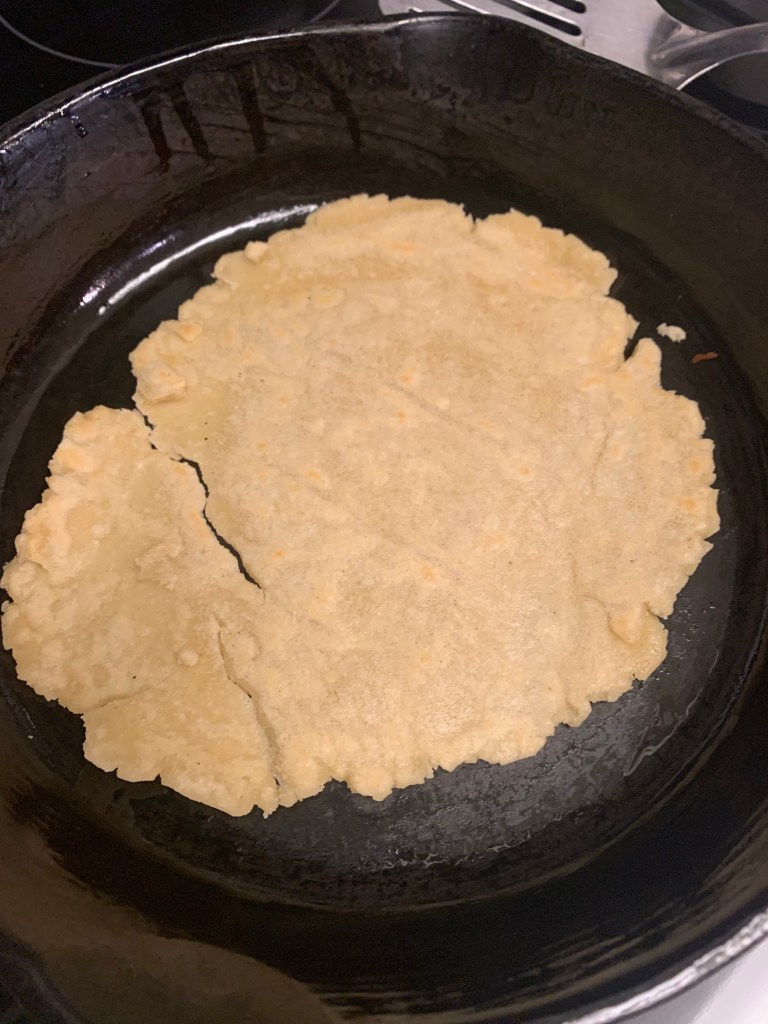
So as we continued on, I tried to get my dough a little wetter so it would stick to itself more, which of course made it stickier. But the key for tortillas is to roll them thin so they bubble up when they cook. As you can see, I don’t know what a circle is (evident by my pizza making skills also haha). But also they are coming out stiff! Like I’m almost frying them, which I’m not because I made sure to get rid of the excess oil. I played around with the temperature of my cast iron, between hotter so it wasn’t on as long, to less hot so it would cook slower. Nothing was really working.
A stiff tortilla
By the end of it, I was left with a pile of mediocre “tortillas.” I use the term lightly because I would, in no way, refer to them as tortillas in front of anyone. Except, of course, anyone reading this, because this is an educational opportunity.
Am I defeated? Maybe a little. But I will try again. And try a whole bunch of different things differently. If you think you can do better than me, here is the link to the recipe I used by milkandpop (sourdough discard tortillas).
When making multiple things at once that require proofing, baking, and other multi-tasking, be aware of where your oven vents.
Every Sunday, I make my husband a loaf of sandwich bread. It’s super easy, and while it does take a couple of hours out of time, I enjoy it, plus it’s better for him in the long run. So I figured while I was doing this, I would make myself a loaf of bread—that beautiful, gluten-free white loaf—because it would take about the same amount of time and I could mix it in between proofing times of the sandwich bread. Plus, the gluten-free bread only requires one proof rise, whereas the sandwich bread requires two. Okay, so here’s the scene: the sandwich loaf is on it’s second proof, which means I’ve shaped it and it’s in the loaf pan. The gluten-free bread has already proofed and is now in the oven. While the oven starts at 425 degrees, the bread itself bakes at 400 degrees. I usually do not have anything in the oven, so I just have my bread on the stovetop, lightly covered with a clean flour sack towel, while it proofs.
Can you sense where this might be going?
So now my bread 1 (sandwich loaf) time is going off, its ready to go into the oven, but my oven is too hot, as it only bakes at 350. My gluten free loaf only has 10 minutes or so left – I figured I could gradually lower the temp. The other part of this story is I forgot to originally turn my oven down so it started the first 15 minutes at 425 degrees. oops. I get the oven to 375 and go to take uncover my sandwich bread. Cue the “oh no oh no” music.
As you can tell, there wasn’t too much damage. Where it was stuck to the towel, there was a bit of crust trying to develop, but overall, it did not affect the bread to much. So where my bread was proofing, there is also a vent. So needless to say, I will not be doing that again. Next time, I will find a better place for it to proof, if I am using the oven at the same time.
Are we not humans if we don’t make silly little mistakes? Luckily, my husband isn’t Paul Hollywood, and I’m not on bread week of the Great British Bake Off.
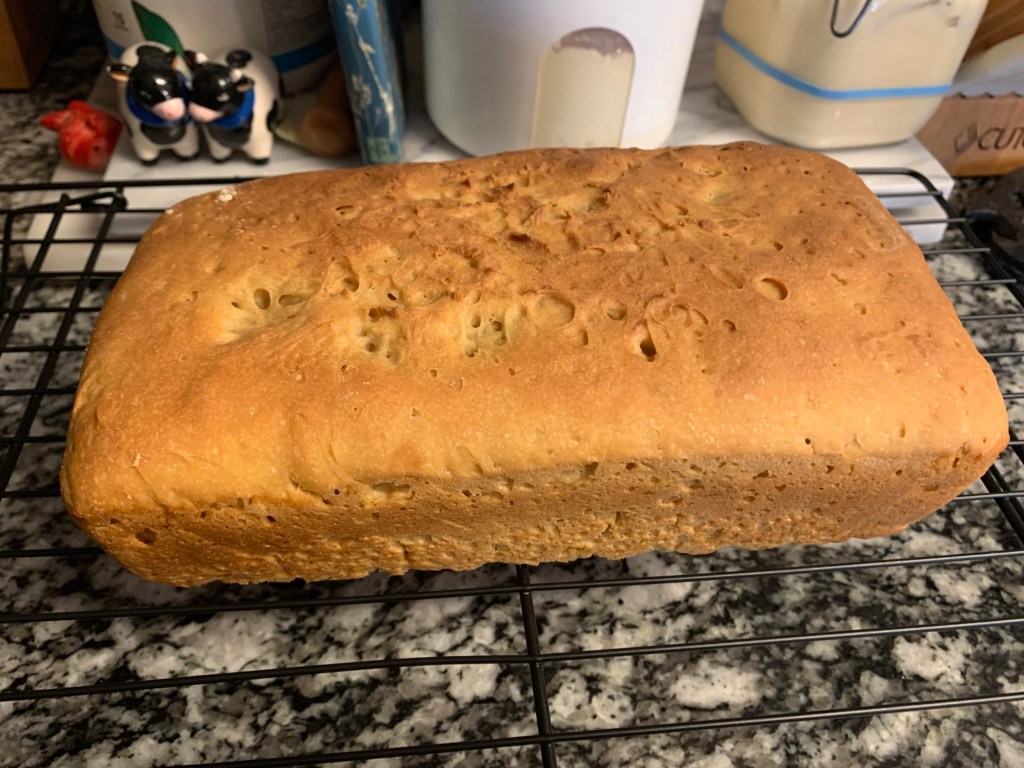
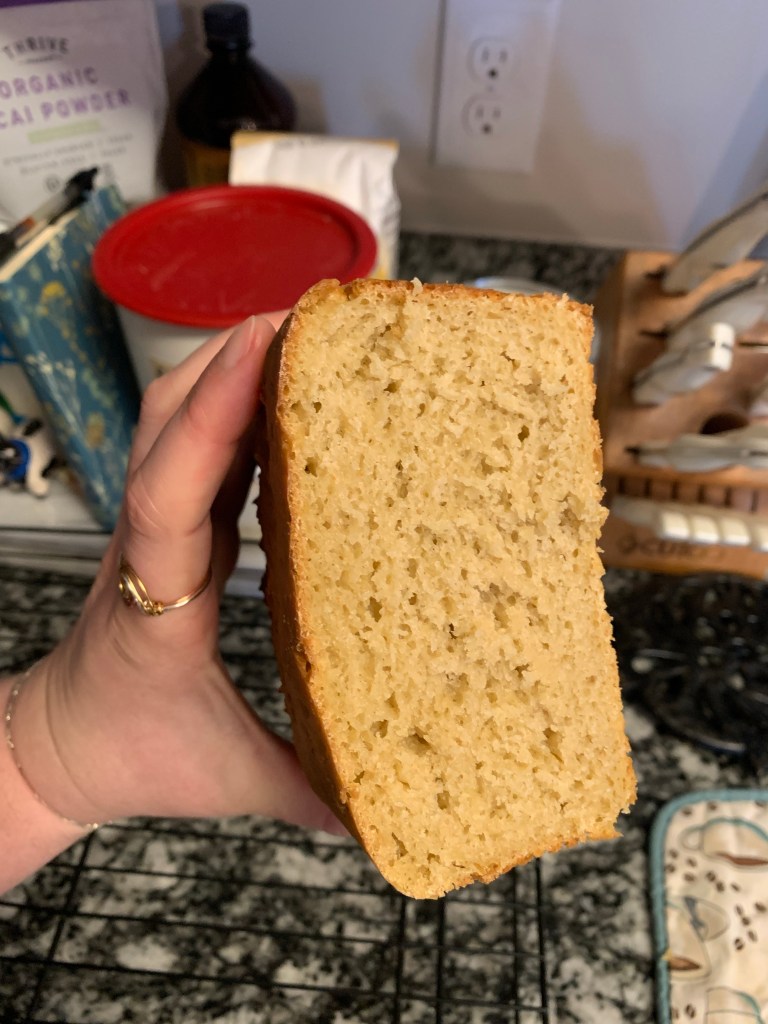
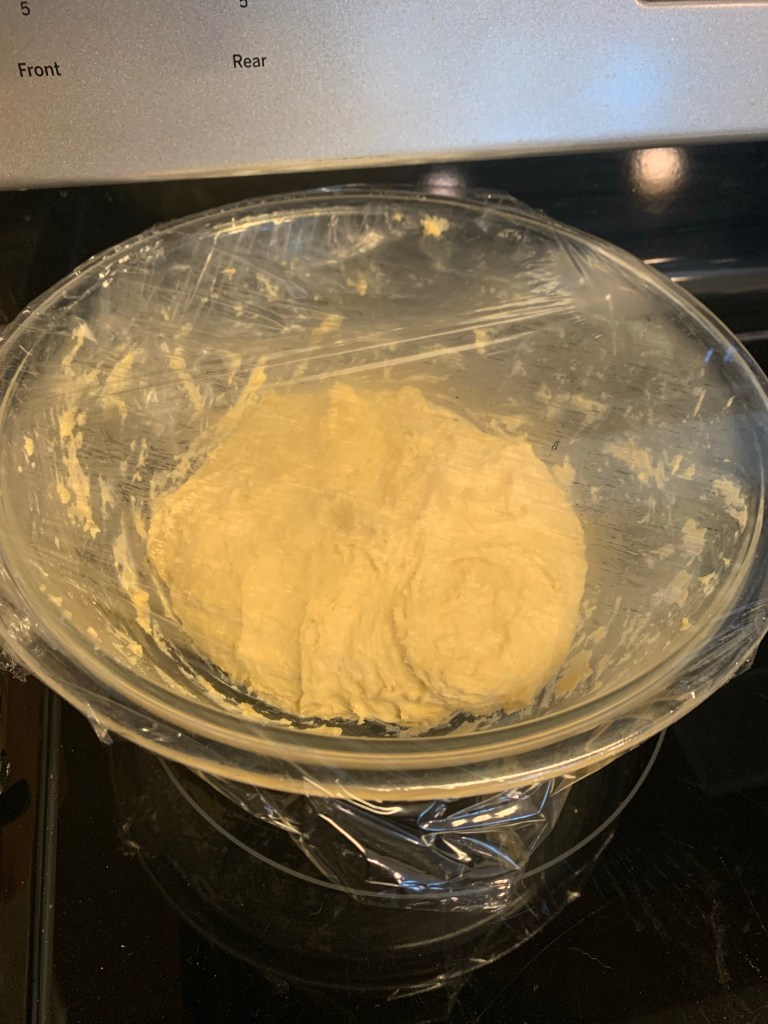
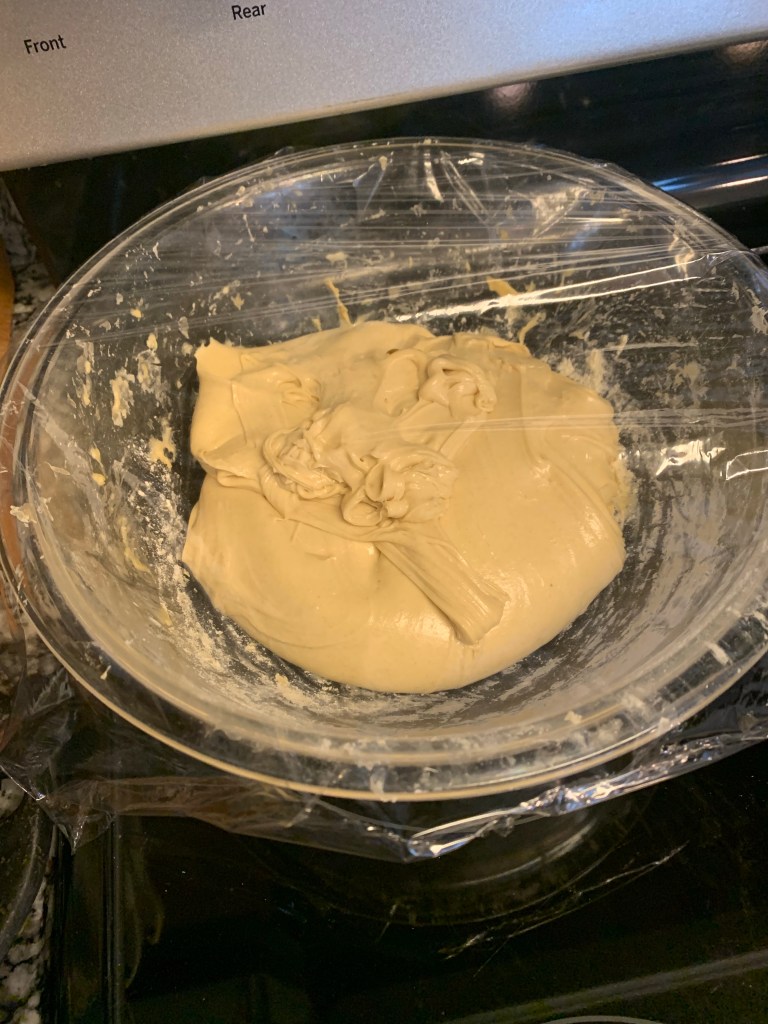
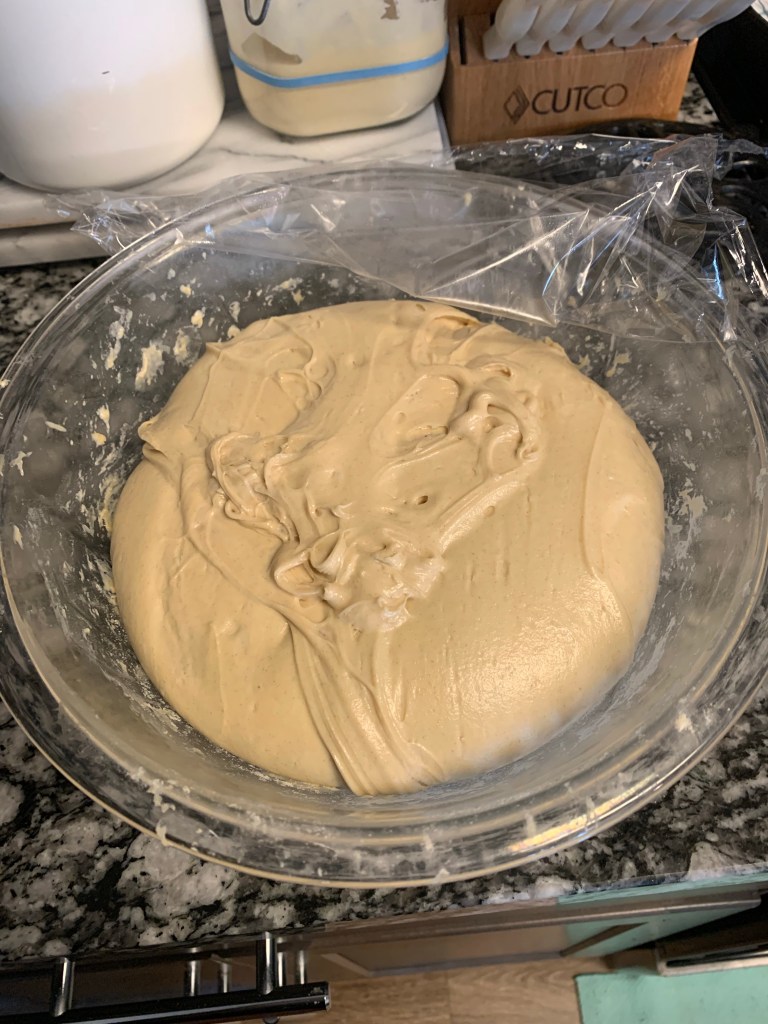
I did it. I conquered my goal of making soft, gluten-free bread that is delicious and easy to cut. And it cost me about the same time as it does to make a regular loaf of bread. The only catch was that I did not use a 1:1 blend. I had to make a blend that used tapioca flour, brown rice flour, and sorghum flour. The other plot twist for this bread is that instead of the typical xanthum gum that most gluten-free bread recipes use to mimic gluten, this recipe uses psyllium husk. When you mix it with water, it creates this gel, but once you mix your dough, you get such a lovely, pliable, kneadable dough. You know how hard it is to knead gluten-free dough? Practically non-existent. Most of the time, it’s too wet and sticky to knead, and you have to leave the dough alone so it can get the rise it needs to bake.
I didn’t think to snag a photo before I rolled it out and shaped it, so this will have to do. This is before it proofed for the hour. Look at that free form loaf!!
And here we have our finished cake. Truly, *chef’s kiss*, albeit a little wonky.
Now let’s talk about the finished product! The bake! The chew! It was amazing and wonderful. The crumb looked perfect. I’m already thinking about my next loaf.
You can catch the full recipe at The Loopy Whisk or click here. I will be baking more of her recipes; she has a beautiful challah loaf that caught my eye on Instagram that I am dying to attempt now that I have made this simple loaf.
There is just nothing like a fresh, baked bread. In fact, I am due to make a loaf right now. TTFN (ta ta for now!)